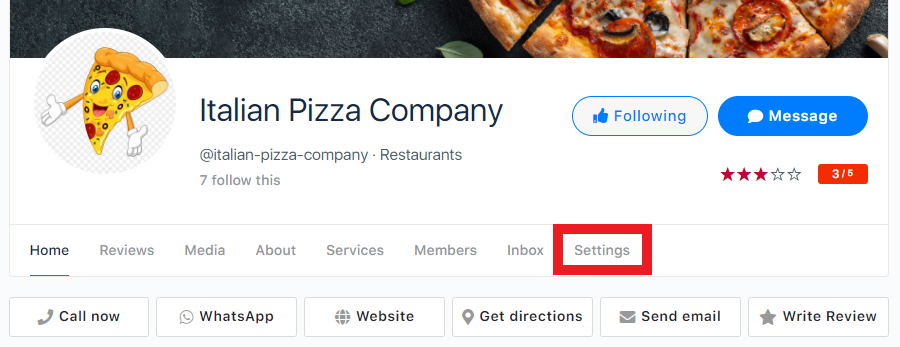
At the top of each Space is a row of buttons. We call these the ‘Action Buttons’. We think this is a very powerful tool to quickly get your Space’s visitors to engage with your company or organization, and strongly suggest you configure them as soon as possible.

Space Settings
You configure the Action Buttons via the Space ‘Settings‘ tab. You may not have visited this part of your Space before, so let’s take a little tour. Head to ‘Settings‘ in the main navigation menu. If you are a Space owner, this will be visible. If you are a site administrator, you can also access and edit the settings for every Space you host.

The Settings screen is split into 5 sections:
- General Settings – change your Space’s title, category or description here. This is also the place where, if you choose to, you can delete your Space.
- Media Settings – a place to upload a new profile picture or cover image, and to view, delete or pick your previous profile and cover media.
- About Information – this is where you can add the contact details for your company or organization. None of these are mandatory, but if you fill them, they will appear in the ‘About’ screen. This is also where you add information to be used by your Action Buttons, and we will revisit this shortly.
- Tabs and Buttons – use this screen to choose which optional menu items you want to display, and they order they are to be shown in. Home, Members, Inbox and Settings are mandatory as they are integral to making your Space function. You are free to turn off (using the checkbox) these items. This is also the screen to choose your main button.
- Sidebar – use this screen to make choices on how the Space sidebar will look.
Configuring the Action Buttons
Head to About Information. There you will be able to enter a range of information for your company, business, organisation or any other entity.
- Phone Number – enter your main phone number here. When a user clicks on this, their phone application will open, so they can go right ahead and make a call.
- WhatsApp Number – enter a number here that people can reach your WhatsApp account on. Similar to the phone number, this will open WhatsApp on your user’s phone, or WhatsApp Desktop if they have it installed on a PC.
- Email Address – when a user clicks on this Action Button, their email client will open.
- Website – this will open the website you have added, in a new tab or window.
- Address – enter your organisation’s address here. If you have Google Autocomplete enabled in the backend settings, you will be able to select an address as you type. When a user clicks this Action Button, Google Maps will open in a new tab or window, and show directions from their current location, to your organisation’s address.
I don’t want Action Buttons
While all Action Buttons are visible to Space owners, if you leave any of the fields blank, the corresponding button will not be visible to other users. As a Space owner, you can see which buttons are disabled, as they will be greyed out.
The Write Review button
Your users can click this button to be taken immediately to the Space Reviews section. If Reviews are disabled in the admin settings, this button will not be available.
I want to add more buttons
Using hooks, you can add more buttons to the Action Buttons row. To add buttons to the start, use this action:
wpe_wps_header_actions_startTo add buttons to the end, use the following action:
wpe_wps_header_actions_end


