
Business directories in online communities and membership websites offer a lot of advantages. For starters, a business directory is an easy-to-access area on your website that allows potential customers and entrepreneurs to connect with other organizations relevant to them. Having one helps your community members make networking much easier.
With Spaces for BuddyBoss, you can empower your community members by giving them a dedicated hub to promote their products or services, network with other members, and build a following all from within the comfort of the online community they’re in.
Learn how to get started with Spaces for BuddyBoss, with these step-by-step guides:
- Setting up your Space
- Assigning Team Members to Manage Your Space
- Sending and Receiving Messages using your Shared Inbox
- Filtering Spaces (Locations, Categories)
Setting up your Space
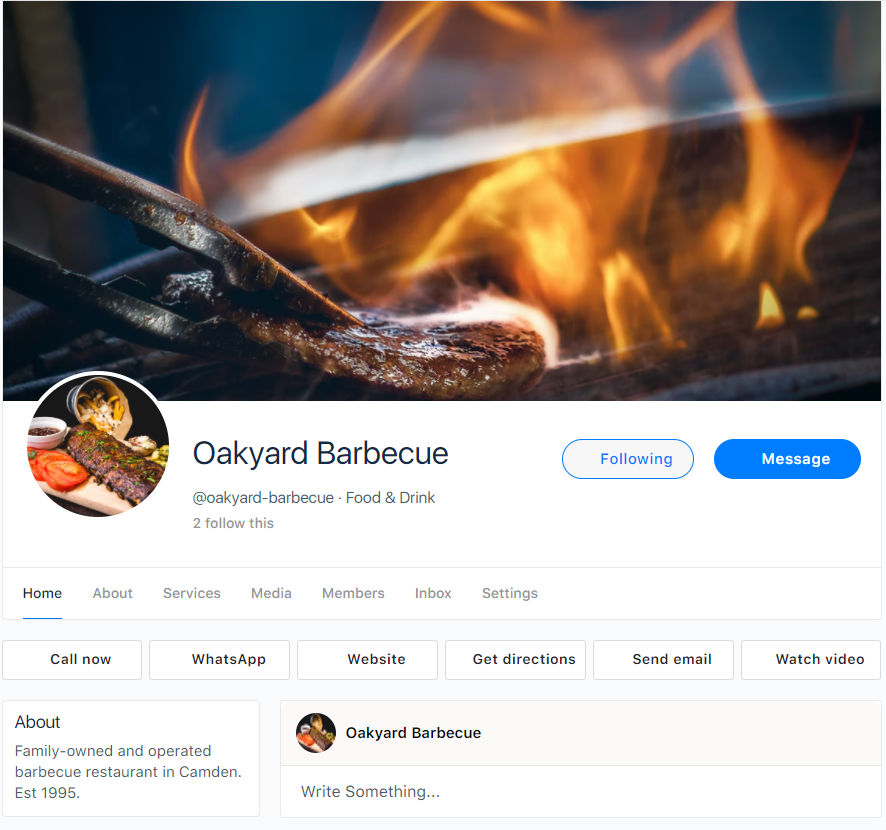
A Space is a dedicated hub for your business or organization. There are several features in every Space, including:
- Space Profile Photo
- Space Cover Photo
- Space Tag
- Space Description
- Space Categories
- Call-to-Action (CTA) Button
- Customizable Sidebar
- Customizable Menu Options & Buttons
Space Profile Photo
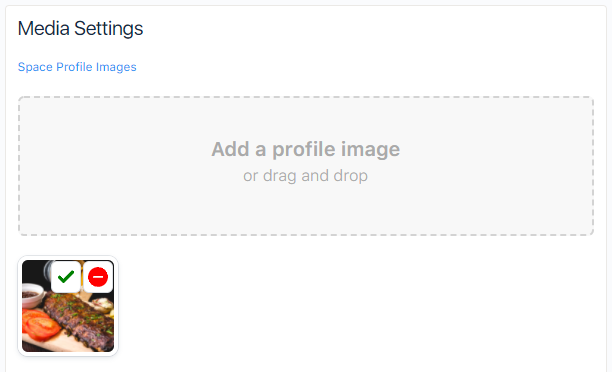
Your Space’s profile photo appears on the top left portion of the Space and will also appear on each post that you create. You can upload a profile photo when you create your Space and change it at any time.
To add a Space profile photo:
- Go to your Space
- Select Media Settings
- Upload your profile photo
- Choose your profile photo and click on the green checkmark to set it as your active profile photo
Space Cover Photo
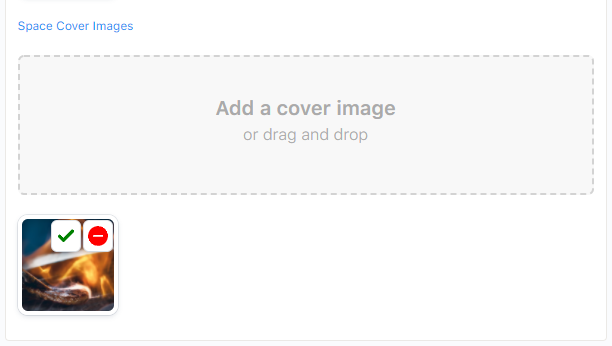
Your Space also features a Cover Photo that appears on the top of your page.
To add a cover photo:
- Go to your Space
- Select Media Settings
- Upload your cover photo
- Choose your cover photo and click on the green checkmark to set it as active
Space Tag
The Space tag — also known as your Space username — begins with the @ symbol. It is a unique name for your Space and appears in your Space URL. People can search for your space by using your Space Tag.
Space Description
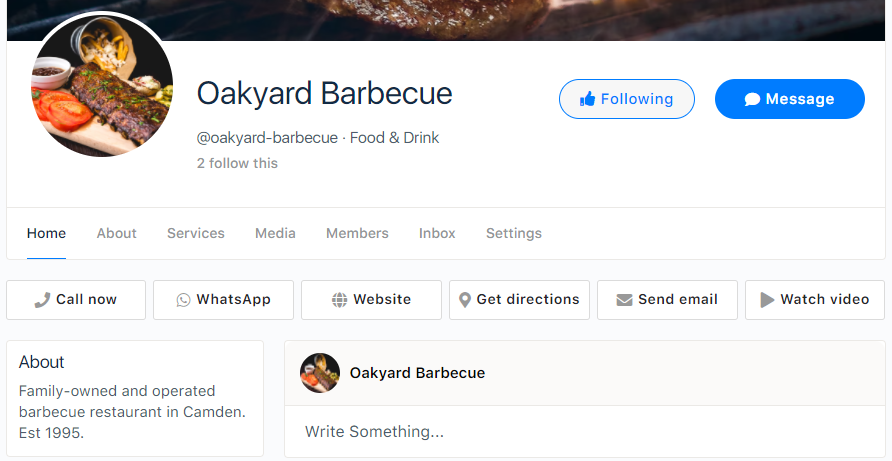
The Space Description is a short introduction to your business that is displayed under the About section of your Space.
To change your Space Description:
- Go to your Space
- Select Settings
- By default, General Settings are selected
- Enter the description on the Space Description text box
- Click Save
Space Categories

Choose the right Category for your Space so that more people can find you and your organization. Site owners can set up unlimited categories in the back end so that members can choose which category a Space falls under.
Some of the popular categories include Food and Drink, Communities, Medical, Hobbies & Interests, Tech, etc.
Call-to-Action (CTA) Buttons
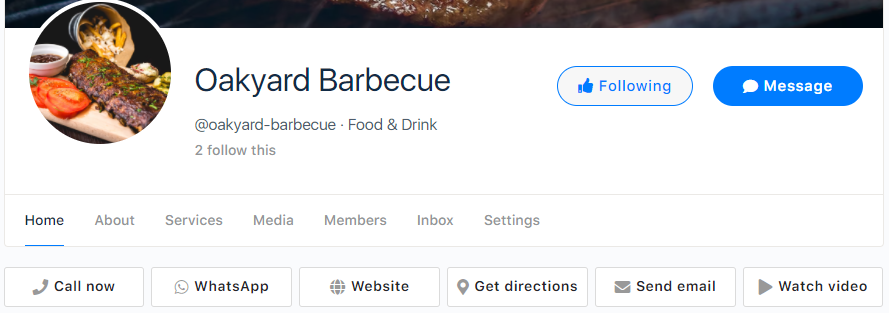
Your Space also features multiple clickable call-to-action (CTA) buttons that prompt users to perform actions like calling your business number, learning more about a service or product, or sending a WhatsApp message to the Space owner, and more.
The CTA buttons appear just below the name of your Space. Potential customers can simply click on any of the buttons to connect with you.
To activate the CTA buttons:
(Call Now, WhatsApp, Website, Get Directions, Send Email)
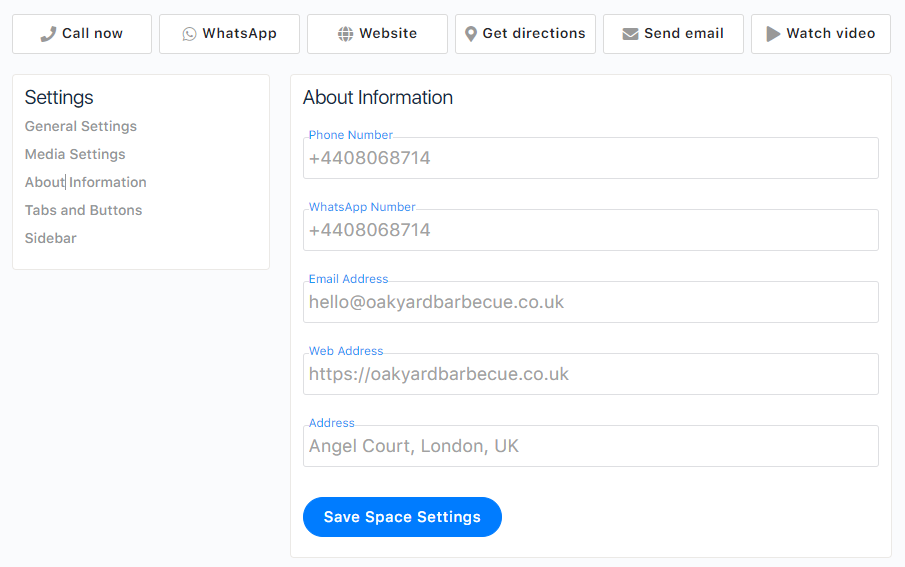
- Go to your Space
- Select Settings
- Fill out the text boxes with the correct information
- Press Save Space Settings
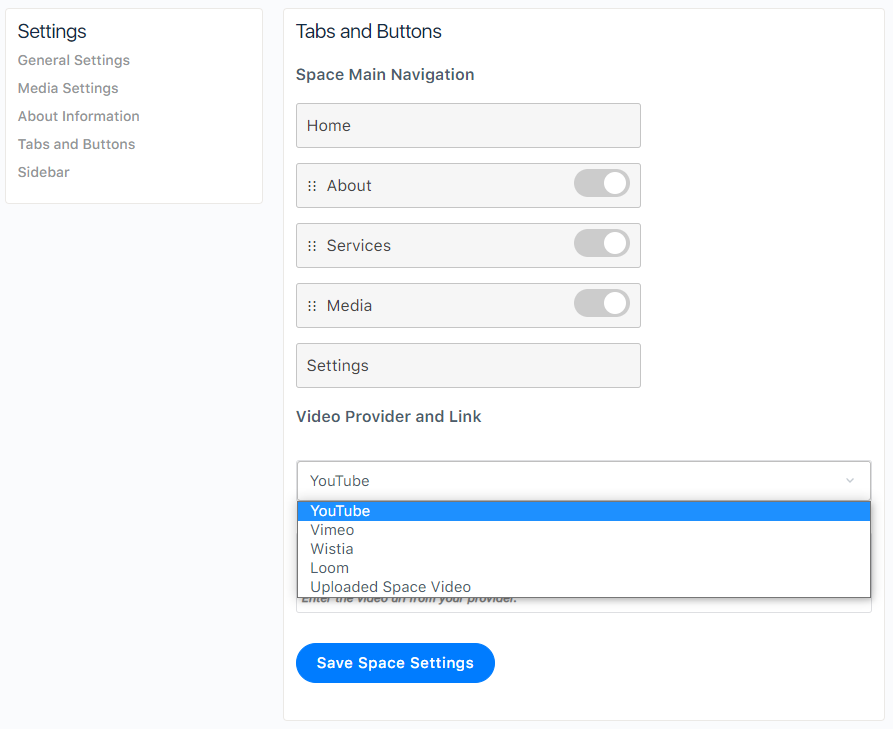
To activate the Watch Video button:
- Select Settings
- Click on Tabs and Buttons
- Enter the URL of the video
You can enter the URL of videos hosted on YouTube, Vimeo, Wistia, Loom, or use a video you have previously uploaded to your Space.
Sidebar
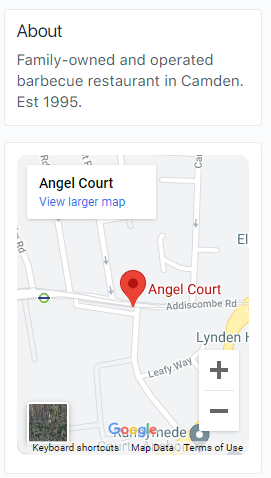
Your Space features a sidebar that features a summary or infobox about your business. You can configure settings such as showing the map, showing your Space team members, or toggle to select the compact mode.
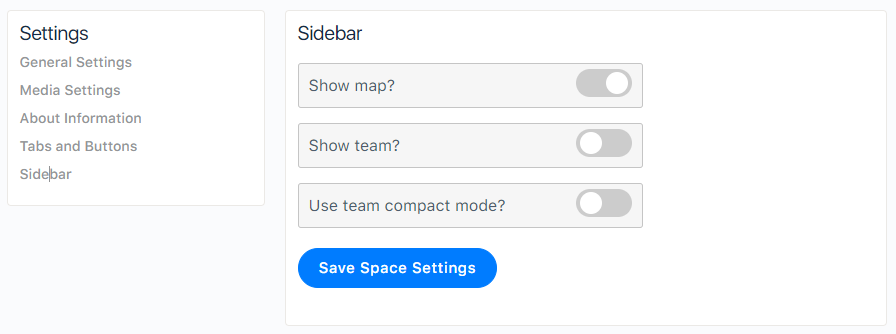
To modify your Sidebar:
- Go to your Space
- Select Settings
- Click on Sidebar
- Configure sliders according to your liking
Customizable Menu Options & Buttons
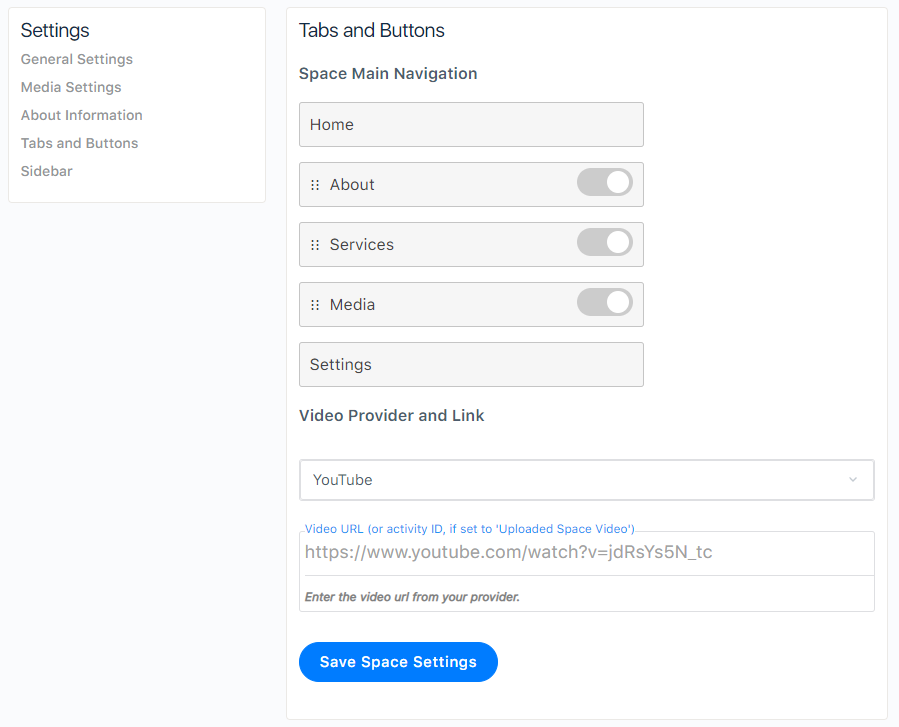
Much like the Sidebar, you can also customize the way buttons and menu options appear on your Space.
To change your Menu Options & Buttons:
- Go to your Space
- Select Settings
- Click on Tabs and Buttons
- Make changes to your settings
- Click on the Save Space Settings button
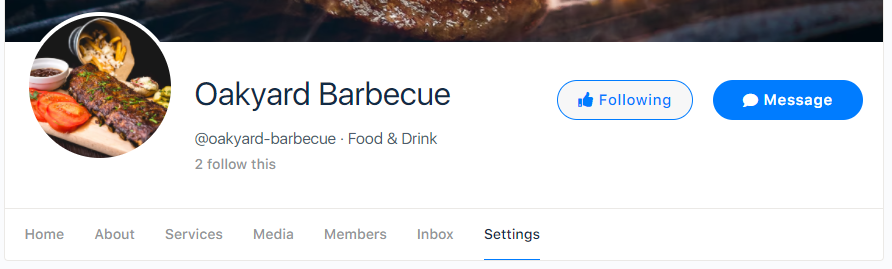
Managing Your Space
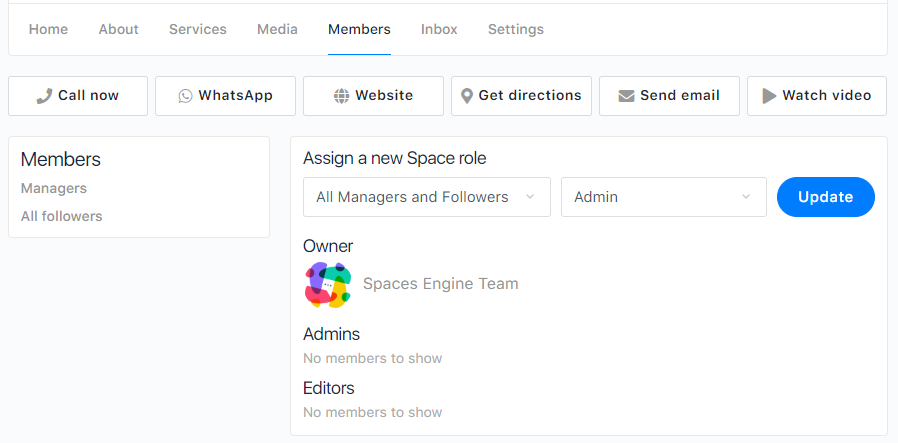
A person who created the Space automatically receives the Owner role. As Space owner, you can assign multiple members to act as Admins or Editors (Managers) to help you manage your Space.
Team Management & Space Roles
- Admins have the highest level of authority and access on a Space. They can modify all the aspects of a Space, from assigning roles and changing other users’ roles to sending messages on behalf of your business.
- Editors have the same level of access as an admin, except managing and assigning Space roles and settings. They can post updates on the Space and respond to messages.
Assign roles to team members and provide them with quick access to features and settings to make Space management much easier.
Send and Receive Messages with your Shared Inbox
Once you have created your Space, you will be able to view, send, and receive private messages to other community members using your Shared Inbox.
Manage conversations with customers, discussions with members, and more.
Members in your community can:
- Send private messages to any Space
- View conversations with Space admins and editors
Space Owner/Admin/Editor can:
- Manage all conversations with members from one central hub
- Respond to messages from other members without revealing your real name or profile and instead show the name of your Space
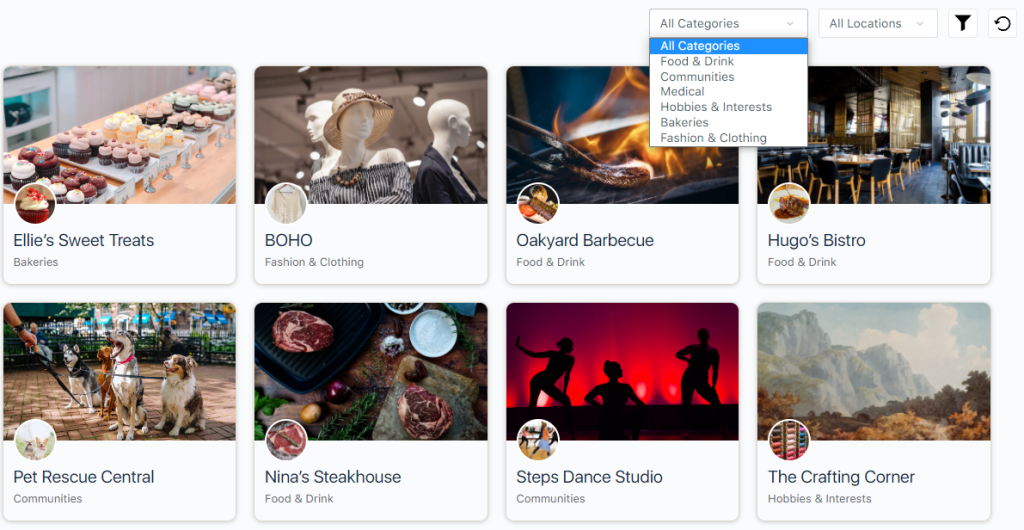
Filtering Spaces

You can apply filters to view or display specific Spaces based on their categories or locations.
To Apply Filters:
- Click the dropdown menu
- Select a category, a location, or both
- Click the Filter icon
To remove any filters, click on the Refresh (arrow) button.

Adding Categories and Locations (backend)
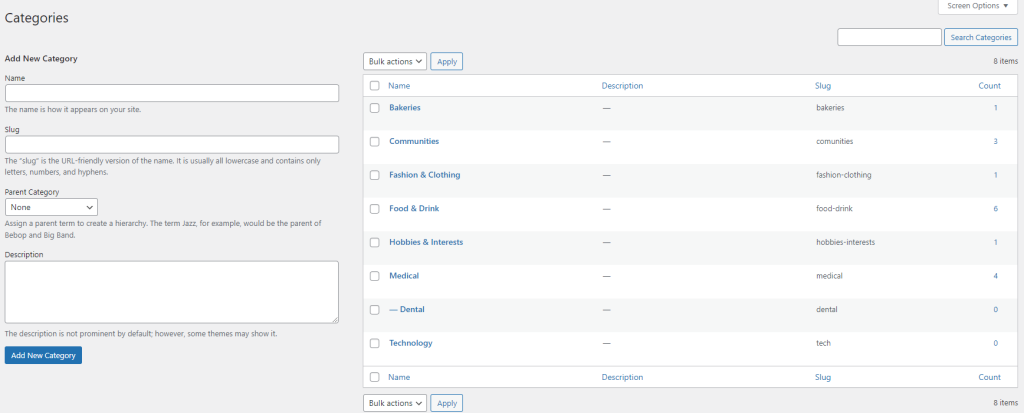
To add Categories:
- Access your WordPress backend
- Click on Spaces
- Select Categories
- Enter a Category you would like to add
- Save your settings.
To add Locations:
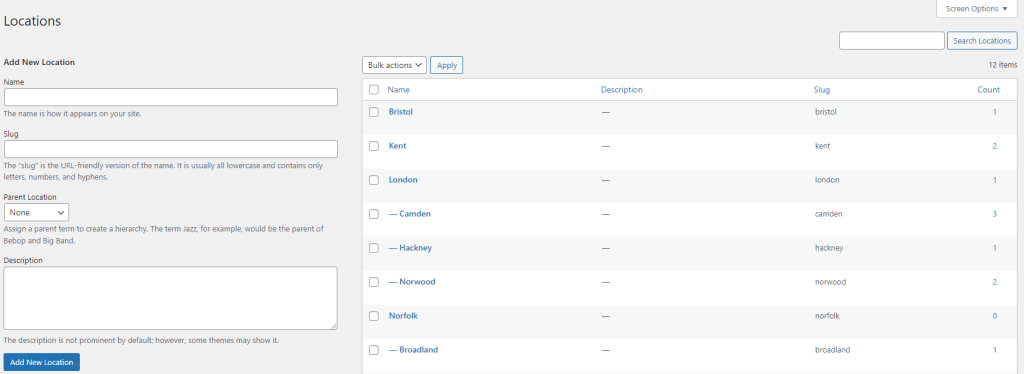
- Access your WordPress backend
- Click on Spaces
- Select Locations
- Enter a Location you would like to add
- Save your settings.
Why use Spaces for BuddyBoss?
Get discovered easily
You can increase your chances of getting discovered whenever customers search for services or products like yours, even if they don’t know the specific name of your organization. Since a majority of customers might not enter a business name when looking for a product or service, having a Space with all the accurate details about your business can help more people connect with you.
Boost Community Building Efforts
Every Space is an excellent place to gather your customers, potential clients, and supporters. After you install the plugin, any registered member on your community website can now build their own Space. All you need to do is configure the settings about limits and privacy and you’re good to go.
Each Space lets you post relevant and useful content for your members, ask your followers to share opinions or contribute with comments and provide a place to leave reviews and other valuable feedback. Your Space creates an extra channel that brings people together to help you grow.
Enhance online presence
Your Space makes it easy for potential customers to find your business. And when they do, it’s likely that they’ll remember your brand and share it with their own connections. Being a part of one community website will allow you to expand your reach to more like-minded individuals and ultimately increase awareness of your business.
Get Spaces for BuddyBoss for your Community or Membership site
Offer more support and value for your customers and get Spaces for BuddyBoss today.
See what’s coming for Spaces for BuddyBoss
[simple-feature-requests-roadmap limit=”6″ status=”planned,started” cols=”2″]
Check out the Spaces for BuddyBoss product roadmap to see what features are coming, and share your ideas with the team too!
Product Knowledge Base
We also created a knowledge base to help get all your tech-related questions answered. You can view all articles here.