In this article, we will look at the initial setup process for a new Space.
Overview
All Spaces are created on the New Space page, created when you activated the plugin. You can reach this page by typing the address into the address bar, clicking ‘Add New’ in the backend (if you are a site admin) or by using the button in your BuddyBoss profile (under Spaces > My Spaces).
However, most users will create their Spaces directly from the Space archive page. Make sure you have added a Spaces link to your main menu so people can find them!
On a desktop, you will see a Space Preview, showing what your new Space might look like. We therefore recommend Spaces are created on desktops.
The New Space Page
On the Spaces archive page, click the ‘+ Create New Space‘ button. You will be taken to the New Space page. This is where the magic happens.
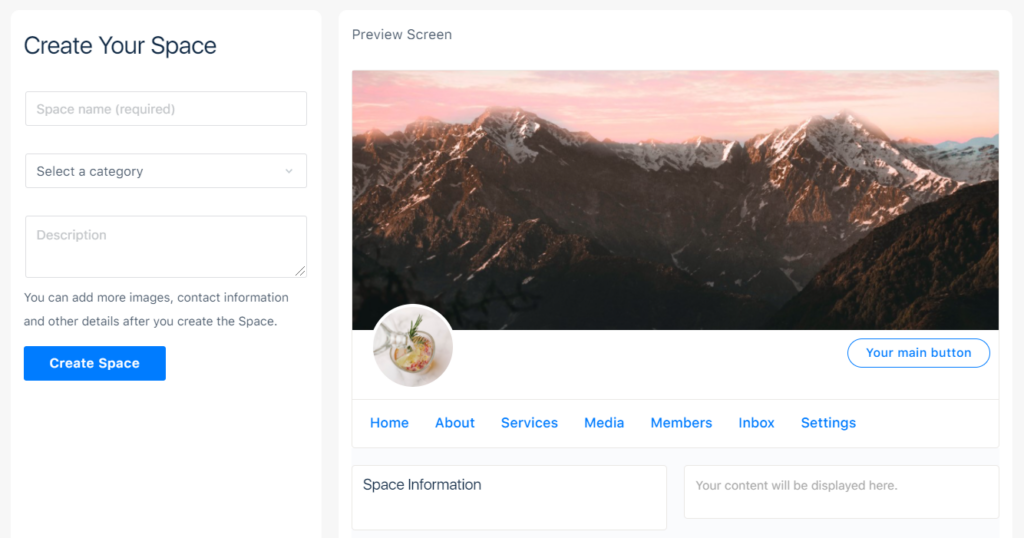
Unsurprisingly, the first thing to consider is your Space’s title. Like any WordPress post, BuddyBoss forum or group, we recommend you keep this short and simple. If you are setting the Space up for a company, go ahead and use the company name.
Next, choose a category. Categories aren’t mandatory, but they do help your site users quickly work out what the Space might relate to.
Then, write a description. What does the company do? What does the organization stand for?
As you enter these, the preview will automatically update.
If you are happy with the information you’ve entered so far, go ahead and click on ‘Create Space‘. Congratulations! Your new Space is now live (albeit very empty!)
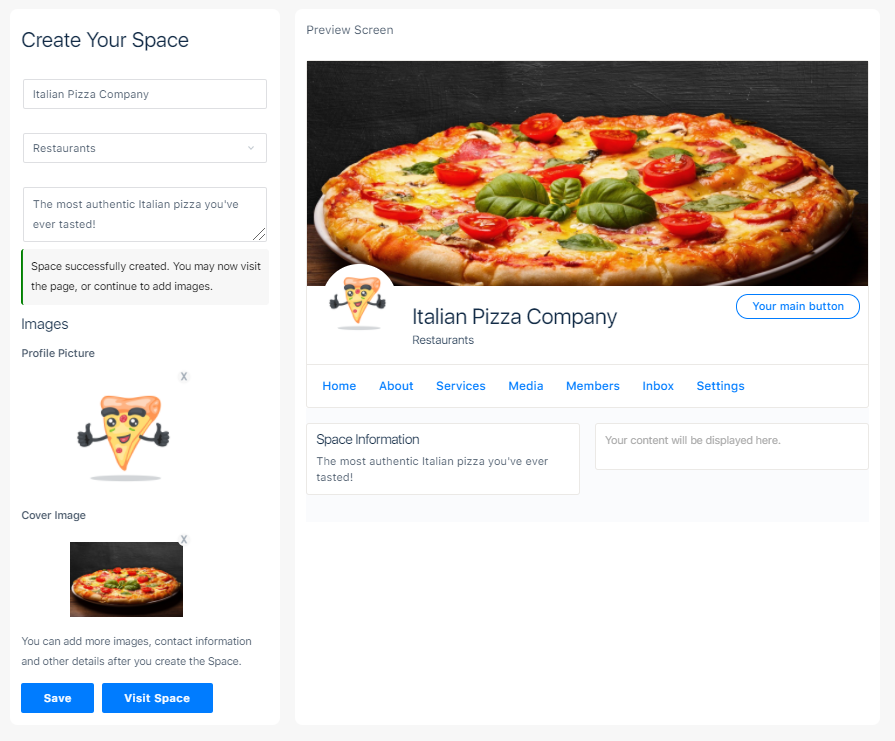
Adding Images
With your Space created, we suggest adding a profile picture and a cover image straight away. You can skip this step, and simply click on ‘Visit Space‘. Don’t worry, you can add these images later.
Click on either of the two grey boxes to display an uploader. All the standard WordPress image formats are accepted. Spaces for BuddyBoss will automatically create your media in a range of sizes ready for use.
We recommend using the same image sizes suggested by BuddyBoss:
| Profile Picture | Cover Image |
| Minimum 170 x 170px | 1300 x 225px or larger |
Once you’ve added your images, the preview will again update in real-time, so you can see how your Space will look.
If you are happy with your images, go ahead and click ‘Save‘. Finally, click ‘Visit Space‘ to see your new creation.
We hope you enjoy this new feature, if you have any further questions please reach out to [email protected]


