Installation
Before installing Version 1.5, please deactivate and delete Spaces Engine for WP Job Manager, if currently active.
From Version 1.5, the Job Manager integration is now inside the main plugin. You no longer need to download and activate a separate plugin from the WordPress repository. If you have just updated Spaces Engine, or WP Job Manager, please flush your permalinks, so that the new Jobs tab shows up in your Space navigation menus.
Using WP Job Manager inside a Space
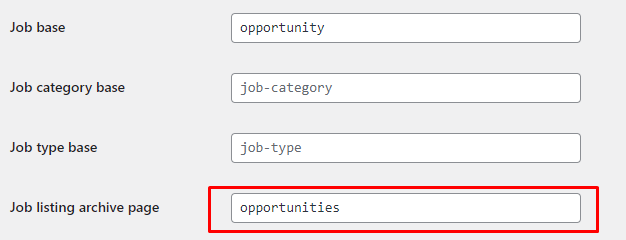
Jobs created for Spaces will be displayed inside a dedicated tab. You can change the name of this tab using WP Job Manager’s naming feature found under Settings > Permalinks. Changing these will affect what jobs are called throughout the site. In the image below, you can see we have renamed our jobs to Opportunities. We suggest you make this decision as soon as possible.
As with most extensions and tabs, Space owners can switch off jobs for their Space. As usual, this is done via the Tabs and Buttons section of a Space’s settings. On the Space you are using to test the extension, go ahead and switch that tab on. After saving and refreshing, you should see a tab in the Space navigation menu. Go ahead and click on it. Remember, if you see any 404 errors, you need to flush your permalinks. At this stage, it will be pretty blank.
Submitting a Job
If you have administrator access to a Space, you can create and manage jobs for that Space. Head back in to your new Jobs screen, and you should see two tab items. Anyone who can view your Space will see the content of the first one, as this is your list of jobs. At the moment, this tab is empty. So let’s create a job. Click on the link, and you will be whisked over to the Jobs Manager job creation screen.
If you are familiar with WP Job Manager, you will recognise this form. To understand more about what these form fields are, see the official WP Job Manager documentation.
Remember to enter which Space you want the Job to be linked to. You will see this as a dropdown near the end of the form. By doing this, your new job will show up in your Space’s list.
Under company information, enter the details of your Space. If you regularly add jobs, Job Manager uses a cookie to automatically populate these fields with your usual settings.
Remember you can set the default currency under your WP Job Manager settings, which will avoid having to enter this each time, especially where all your jobs will be in your home territory.

Viewing Jobs
Once you have some jobs created, you will see them in the All Jobs list. These jobs are specific to your Space. When a user clicks on a job, they will be redirected to that Job’s information page. From there, they can interact with the job, using any of the standard WP Job Manager functions, such as applying for the job, or sharing it.
Troubleshooting
From Spaces Engine Version 1.5, creating, editing, deleting and viewing jobs takes place in the standard WP Job Manager screens. These screens are handled by that plugin, and so if you run into any issues doing any of those tasks, please head to their support pages.
I See an Error About Declaring a Class
If you see the following error, you likely did not delete Spaces Engine for WP Job Manager before installing version 1.5, and the function that should have also deactivated that plugin may also have failed. Simply delete Spaces Engine for WP Job Manager, or remove it via FTP to fix.

I See 404 Errors on My Job Tab
Please ensure you have flushed your permalinks and any site caches you may be using.
Remember: BuddyBoss does not recommend the use of caching plugins.
If you still see 404 errors even after doing the above, send us a support ticket in the usual way.


