Take your Spaces to the next level with custom fields and filters. In this guide, we will talk you through the basics of creating and using custom filters with Spaces.
First Steps
If you haven’t already, please ensure you have completed the article on Getting started with custom fields. We will be using the fields created in that article to build our custom filters.
Making fields filterable
In may cases, custom fields will be used to provide extra information such as telephone numbers which (for obvious reasons) wouldn’t work well as a filter to search Spaces with. But what if you wanted to, for example, only visit a vegetarian restaurant? Or one that had lots of parking spaces? As a site administrator, you can choose to make any of your custom fields filterable. And it is really easy.
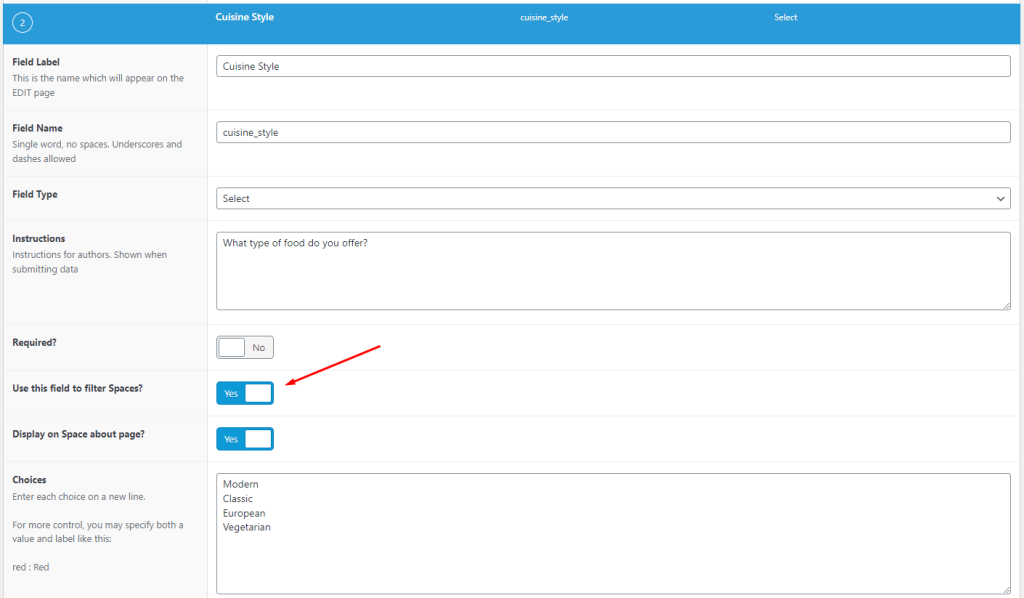
Go back into the custom fields menu item, and then the field group we created in the last step. Now, for both our new custom fields, toggle the ‘Use this field to filter Spaces?‘ button.

Using custom filters
As long as you’ve ticked the filter toggle, your filters will show up in the Spaces archive page.

Improving on parking spaces
You may have noticed a small problem with the example above. Right now, a user would need to enter the exact number of parking spaces to find Hugo’s Bistro. That doesn’t help a user who is simply looking for a restaurant with a big car park. So this is a great example of how we can use the power of Spaces Custom Filtering to make the user experience even better. All we need to do is change the field type for the parking spaces field from ‘number’ to ‘range’. The image below now makes much more sense. There are heaps of tricks and techniques to get your custom fields working well with filtering, more than we can possibly write about. If you aren’t already a member, we have a great community at https://www.facebook.com/groups/spacesengine where you can discuss with others the best way of achieving your goals.


