You all have heard of the WP Job Manager – one of the best job listing plugins for your WordPress website. But do you know that you can submit and publish job listings from your Spaces now?
Yes! It’s possible. Learn more from our official doc here.
Our Spaces team has been working relentlessly for Space users to have a dynamic channel for their BuddyBoss Community. Having the feature to integrate WP Job Manager to offer Jobs from your Spaces adds to one of the many spectacular signs of progress we have been making so far.
In this article, we will talk about what are the essentials of having a job listing on your Spaces and how you can integrate WP Job Manager using our easy integration plugin: Spaces Engine for WP Job Manager.
Context:
- Why Do Space Users Need Job Listings on Spaces?
- Prerequisites
- Getting Started with WP Job Manager for Spaces:
- Installations of the Plugins
- Installation 1: WP Job Manager
- Installation 2: WP Job Manager – Applications
- Installation 3: Spaces Engine for WP Job Manager
- Setting Up WP Job Manager for Spaces:
- Job Categories:
- Job Types:
- Spaces Engine for WP Job Manager – Using the Extension:
- Creating Job Listings In Spaces:
(Step by step guide containing seven essential steps to create a job listing in a Space) - WP Job Manager – Applications
- Installations of the Plugins
Why Do Space Users Need Job Listings on Spaces?
Spaces are best known for filling up the gaps in BuddyBoss. You can publish posts, video content, news, or any announcements and even create custom tabs to promote any event. With all these features ahead for your BuddyBoss Community, now you can publish custom job offers for your company. Why is it important? Let’s highlight the facts here:
- All In One: WordPress is an easy community platform to manage job applications. But when you are the owner of multiple Spaces, let your audience view the job applications on specific Spaces as per their preference. Why bother them to have the Job List from a page that is not in the Space and get confused?
- Not A Double Click: WP Job Manager is a smart job listing plugin. But to use it with Spaces, you need a simple integration plugin – Spaces Engine for WP Job Manager. It’s an extremely easy plugin. All you need to do is just install it and the rest of the options will appear in the Spaces. We will walk through them step by step.
- Send Message as Space: Yes! You can now send messages as a Space to the applicants who responded to the Job offers. It’s a very promising feature and establishes smart and interactive communication between Space owners and applicants. It helps to remove any immediate confusion if they have any and develop a transparent relationship about the organisation.
- Let Them Filter Out: Filtering through job offers is a common feature. This is available in more or less every job management plugin out there. In Spaces, this feature is optional. And you can let your audience choose through the variety of jobs offered. From Job Types to Job Categories, they can roam through any preferable opportunity they are looking for.
- Manage Applications Easily: Once applicants have submitted the form, you can easily keep track of how many enthusiasts have applied for different jobs by using the Job Applications Add-On. Since WP Job Manager is a free plugin, you can have different Add-Ons to elevate the recruitment process. Applications and Resume Manager is one of them.
Prerequisites:
To begin with WP Job Manager for Spaces, any Space owner will need two plugins for the WP Dashboard. Additionally, you can have one Add-on we mentioned here to offer a systematic job application for the candidates.
1) Spaces Engine for WP Job Manager: It’s a free integration plugin for Spaces and you can install it from the WordPress repository. It builds the bridge between Spaces and WP Job Manager. To install and run this plugin seamlessly in your platform, you need to make sure you have the latest version of Spaces Engine or at least V1.2.1.
2) WP Job Manager: WP Job Manager is a lightweight job management plugin available in the WP repository. Yes, this core plugin is free and you can create simple job samples from here. But for advanced options like Auto Job Suggest, Applications, Bookmarks or Resume, you will have to take the help of the Add-Ons.
3) WP Job Manager – Applications: Applications are one of the many add-ons you can have with WP Job Manager to receive and submit application forms. It is a smart move to offer candidates application forms rather than providing an email address. This is why we will have this add-on on board with us.
Remember: WP Job Manager and Spaces Engine for WP Job Manager are enough to run job listing successfully from your Spaces. Having an Add-on like Applications is not mandatory but can boost the application process.
Here is the list of plugins needed for this plugin. Now, let’s get started with WP Job Manager for Spaces.
Getting Started with WP Job Manager for Spaces:
It’s time to finally get in the process. Follow these steps to create and process beneficial job listings for your Spaces.
Installation of the Plugins:
We mentioned earlier, Space owners need 3 plugins to have a full-functional job board on Spaces. Let’s take it as a one-by-one plugin:
Installation 1: WP Job Manager
Installing WP Job Manager is easy. Since it is a free core plugin, you can download it from the WP repository.
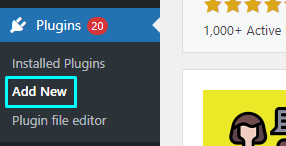
Step 1: Go to Plugins> Add New. Here, you will find two options – 1) Upload Plugin, and 2) Search Plugins.
Step 2: Go to Search Plugins. Type WP Job Manager. And a list of plugins will appear before you. Select WP Job Manager by Automattic.
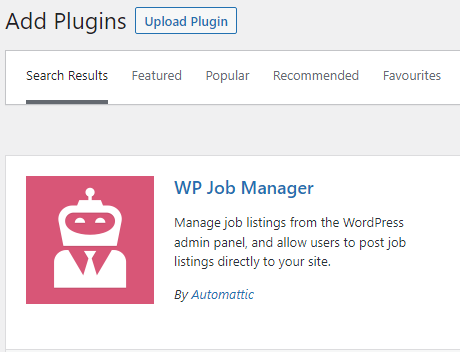
Step 3: Click “Install Now.” This will install the plugin WP Job Manager. Once you have installed the plugin select “Activate.” And you are done.
For more options like – Setup Wizard you can check here at their official WP Job Manager Docs.
Installation 2: Add-on: WP Job Manager – Applications
With Add-ons like Applications and Resume Upload, you can offer a full functional job board for your audience. However, it’s not mandatory. For our tutorial, we will have this WP Job Manager Add-on:
1) WP Job Manager – Applications
The core plugin is free. However, you have to purchase the add-ons from their official page. After completing the purchase, follow these links here to install and learn more about the functionalities of these two plugins from here:
Following these steps: Applications should be ready by now in your dashboard. Now let’s download the last one.
Installation 3: Spaces Engine for WP Job Manager
Spaces Engine for WP Job Manager is an essential plugin to connect your Spaces with WP Job Manager. It is a free plugin and you can download it from the WP repository. Follow these steps to download the plugin and activate it.
Step 1: Go to Plugins> Add New. Here, you will find two options – 1) Upload Plugin, and 2) Search Plugins.
Step 2: Go to Search Plugins. Type Spaces Engine for WP Job Manager. And a list of plugins will appear before you. Scroll down to Spaces Engine for WP Job Manager by Spaces Engine.

Step 3: Click “Install Now.” This will install the plugin WP Job Manager. Once you have installed the plugin select “Activate.” It’s all done. Now all the settings are ready! How? We will show you in order.
Setting Up WP Job Manager for Spaces:
WP Job Manager is a feature-rich plugin. Since we have installed, Spaces Engine for WP Job Manager, it is now ready to use for Spaces. All we have to do is make some changes according to our preference. Let’s get started.
Job Categories:
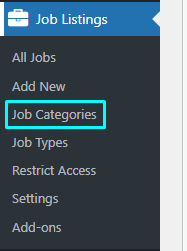
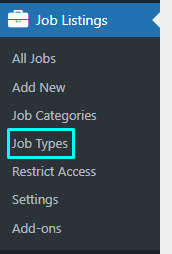
1) Go to Job Listings> Job Categories from the WP Dashboard.
2) From this point, you can create different Job Categories and customise them as per your requirement. Once you have opened Job Categories, you will find a page like this:
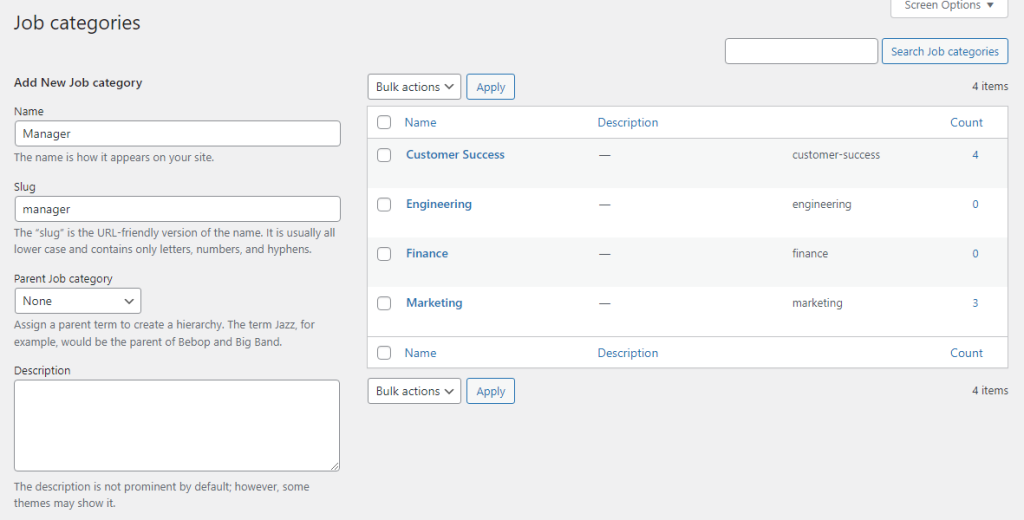
From here, you can set the Name, Slug, and Parent Category (If Any) for a job category, and even add descriptions to it.
Note: The slug refers to the address of the Category page it will forward to. Once you have created a slug for a category and when you visit that address, you will find all the jobs under that category in that address.
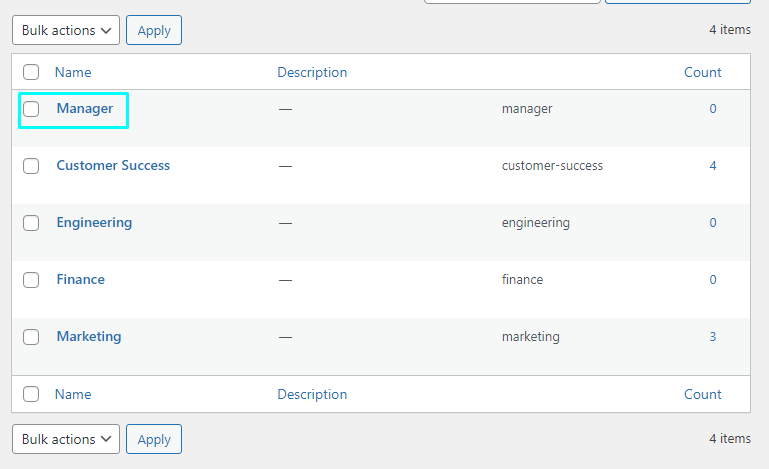
As you can see, we already have multiple categories created using this plugin.
3) Scroll down and you will find several other options like:
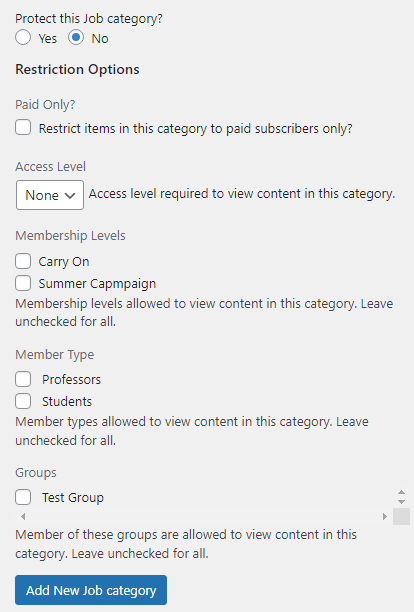
Here, you will find several options to customize and allow limited viewers based on Membership Levels, Member Types, Groups, and Access Levels.
For example, if you go to Member Type and select Professors, only members under this profile type will be able to view this category. You can leave them unchecked for all. The same goes for Access Levels, Membership Levels, and Groups.
You can also restrict the category for Paid Students only and protect the job category as well.
When you are done with all the settings, click “Add New Job Category.” and a new category will be created.
In my case, I have created a new job category: Manager
Job Types:
Job Types refer to the nature of the job – part-time, full-time, contractual, or any other. Before creating a Job Listing, we need to fix these options from the WP Job Manager plugin. Let’s get started with Job Types.
1) Go to Job Listings> Job Types. Here some features will be the same as the features of Job Categories. Hence, we will not repeat them and keep it simple.
2) Once you have clicked Job Types, you will have a page like this:
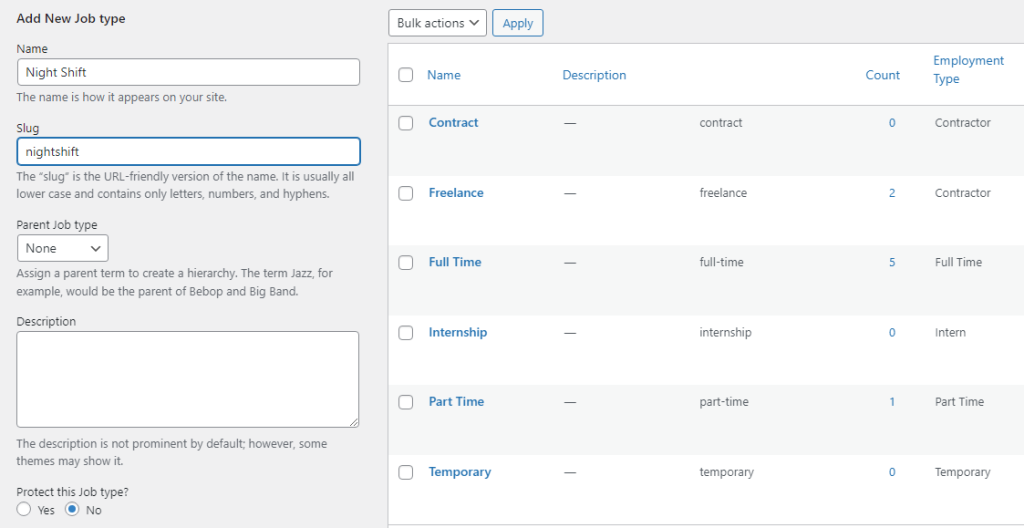
This page contains almost the same setting options as Job Categories. Here, you will have to set a Name, Slug, Parent Job Type (If Any), and the other restriction options that we have seen before.
You will find only one additional option here: “Employment Type.” While creating a new Job Type, you have to assign it under a default job type that already exists in the plugin settings for better navigation.
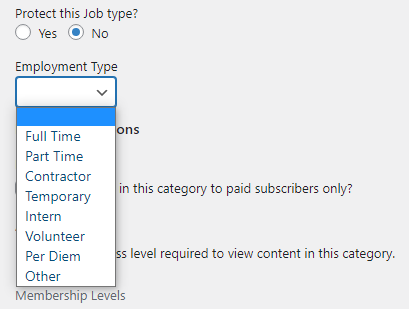
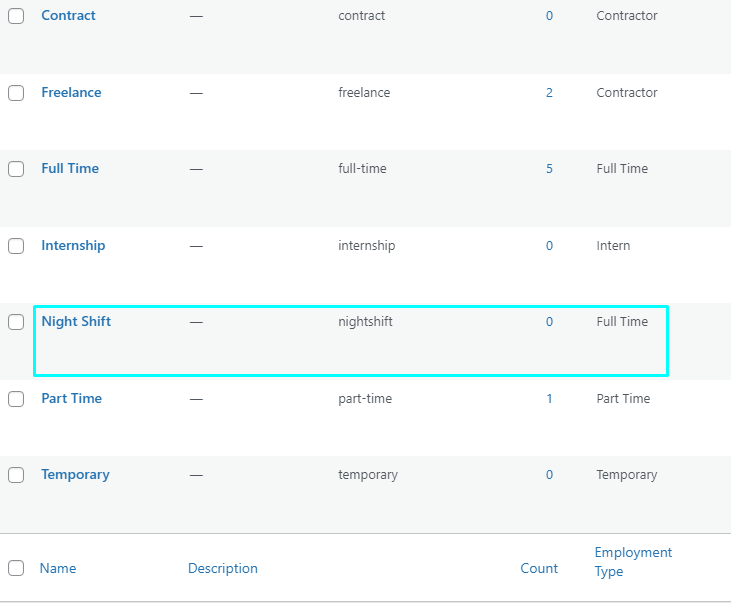
In my case, I have created a new job type: Night Shift. And I will put it under the employment type: Full Time.
3) When you have completed all the setups, click Add New Job Type. And you are good to go.
These are the two major setups we need to publish a job listing from the Spaces. However, there are other important features like: Setting up the Google Maps API Key or Pages. You can always go through the WP Job Manager settings to know more about the plugin.
Pages: You can assign the location of the Job Listing Page from Job Listings> Settings> Pages. This goes way back to Permalinks from your main menu. We recommend you go through “Before We Start” from our official documentation here.
Spaces Engine for WP Job Manager – Using the Extension:
Spaces Engine for WP Job Manager allows Space owners to create job listings where interested candidates can apply. This extension doesn’t bring any specific changes to WP Job Manager plugin settings. And you don’t have to initiate the integration manually. However, you will find an additional tab for Job Colors for Spaces.
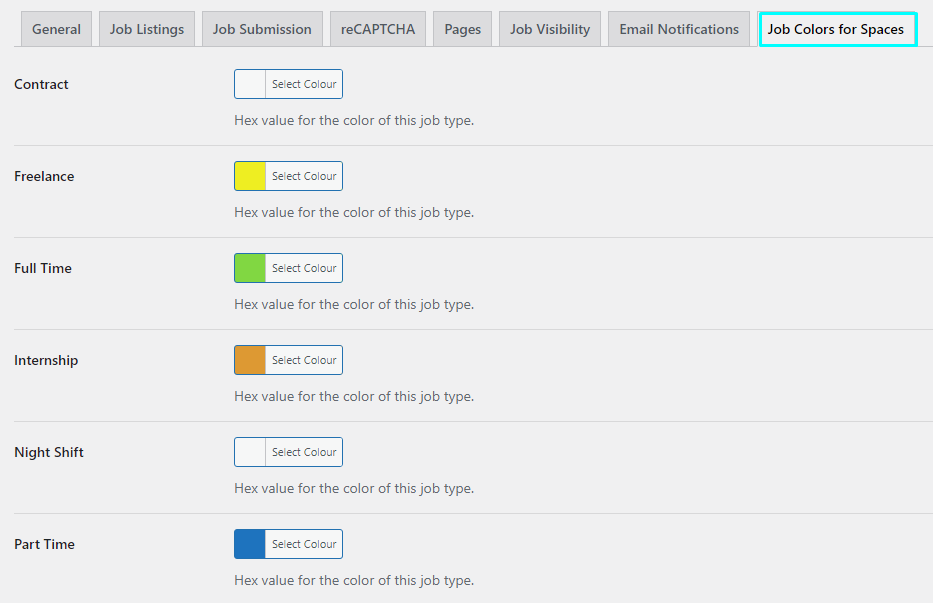
From here, you can set different colors for different job types and set them accordingly. This will help candidates to identify and distinguish between different job circulars.
However, when you go to the Spaces, you will notice the major features there and create Job Listings seamlessly afterward. If you are wondering how? Our next section will answer your questions.
Creating Job Listings In Spaces:
We are all set now. Follow these simple steps to create job listings from your Spaces.
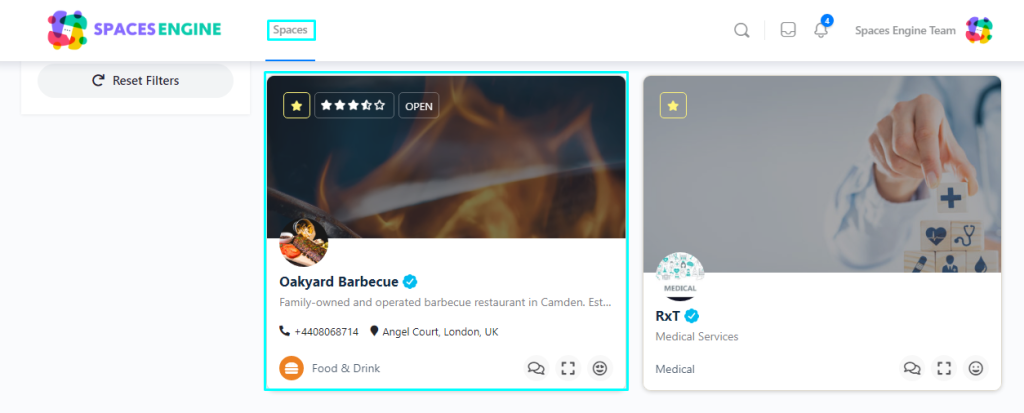
There are several Spaces in my archive, I will use Oakyard Barbecue for reference.
Step 1: Go to Spaces> Oakyard Barbecue.
Step 2: Once you are in the Space. Go to Settings. And scroll down to Jobs.
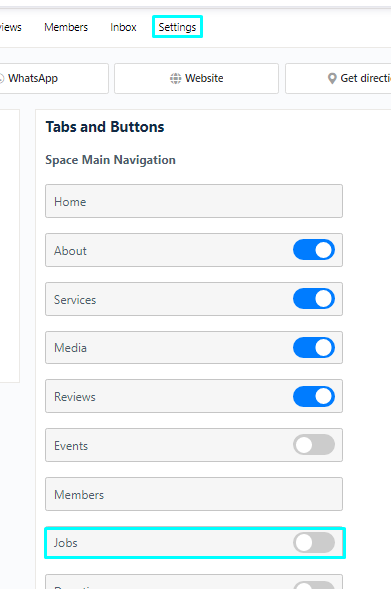
Step 3: Toggle the button beside Jobs. And click Save Space Settings.
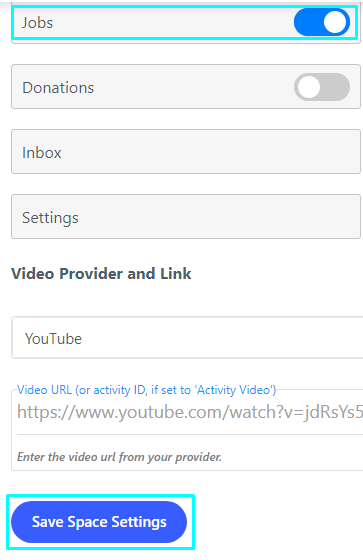
Step 4: Once you have completed the previous steps, you will find a new option “Jobs” in the header menu of that Space. That’s how you can individually activate/ deactivate the Job section for each Space.
Before we run through the Jobs Tab, let’s check on the Job Settings from the side menu.
Step 5: Go to Settings> Job Settings from your Space.
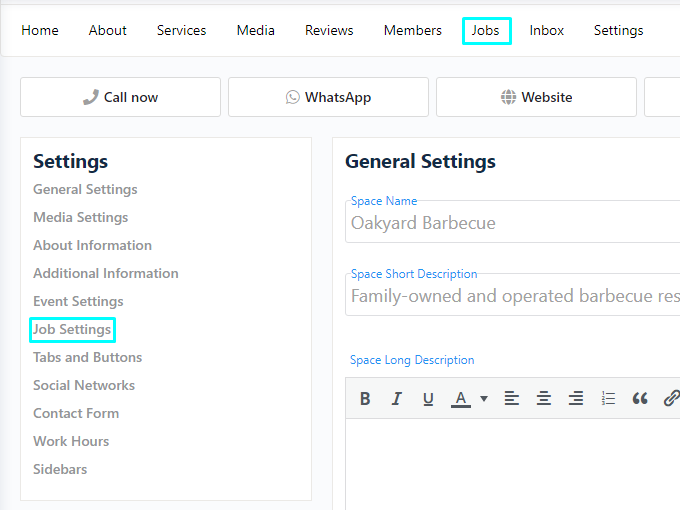
Here, you will find a list of options to set up your Job Board. We will go through one by one to understand how the Jobs for Spaces work.
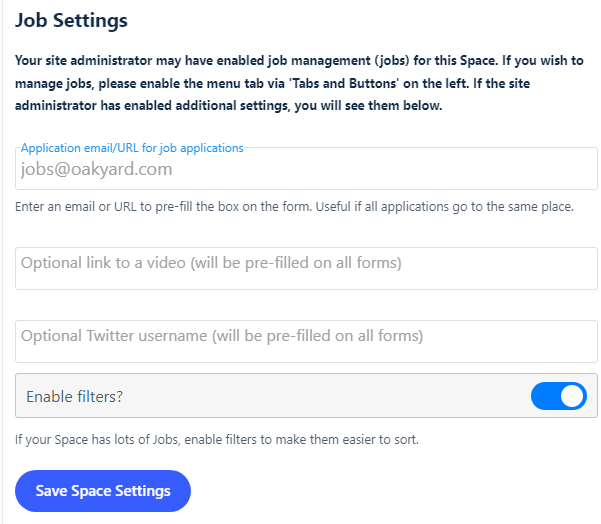
- Application email/ URL for Job Applications: You can set a default email address for all the submitted applications to go to the same address.
- Link to A Video (Optional): You can insert a company video link here. This will be automatically added to each Job Application.
- Twitter Username (Optional): Insert a professional Twitter ID here. This is an optional setting and does not necessarily have to add this information.
- Enable Filters: Filters let candidates choose between a lot of works. When you enable this option, users can filter the job list by category, type, location, or keywords.
These settings will be set as global for every Job Listing you post from any specific Space. Let’s move forward to our next step.
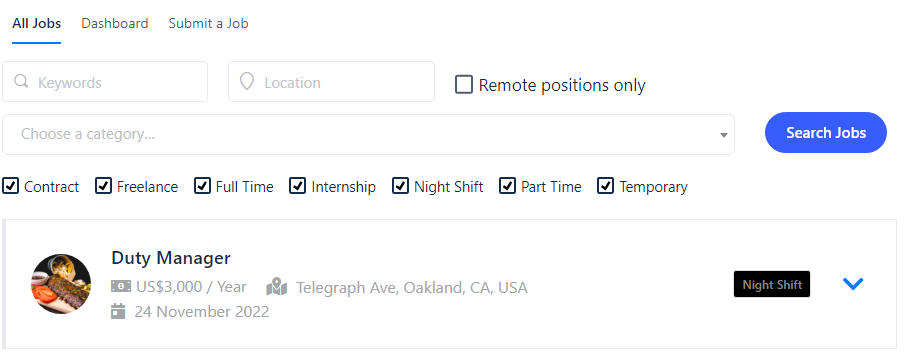
Step 6: Tab – Jobs
Now that you have activated the jobs, there will be a new tab visible in the header section. And you will find a tab like this:
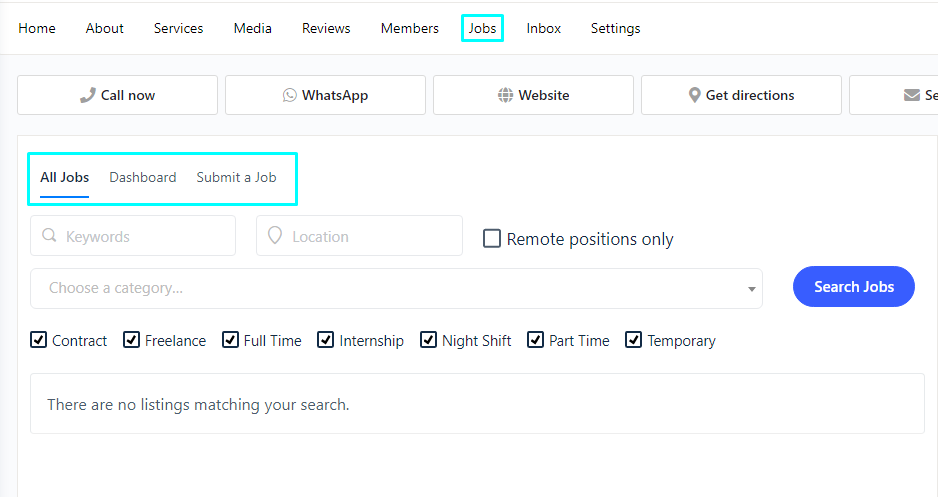
Let’s see what we have here:
1) All Jobs: This option contains all the available job listings in your Space. Since we haven’t published or offered any Jobs, it’s empty for now.
2) Dashboard: From here, Space owners can edit/ mark filled (if any job listing doesn’t accept applications anymore), or delete a job listing. From here, you can take a look at the applicants who applied for the job as well.

3) Submit A Job: From here, Space Owners can create and submit Jobs for the candidates. We will follow this part and create a job listing for our readers below.
Note: These three options are only for Space Owners. For a candidate, the page will look different when searching and looking for a job. You can take a look below to understand how it differs from the Space Owners’ view and Candidates’ view.
Jobs – Tab for Space Owners:
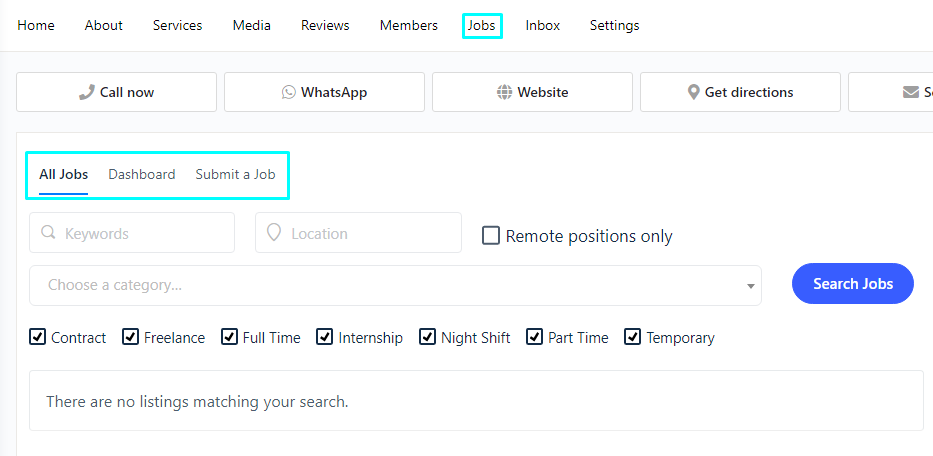
Jobs – Tab for Candidates:
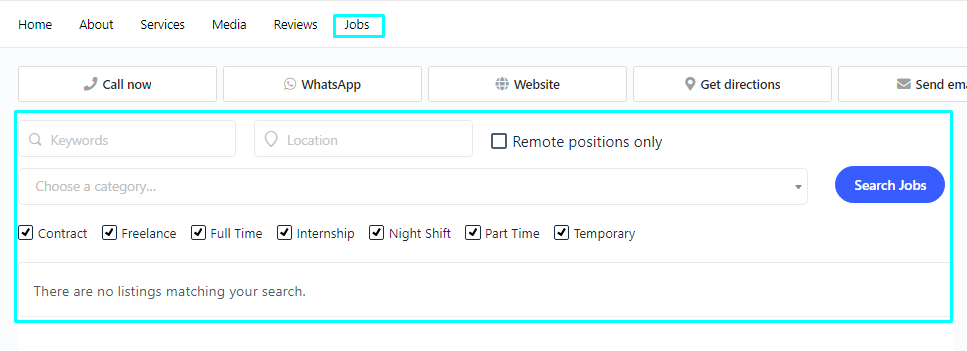
As you can see, candidates can only see the Job Listings and apply for the desired post. If you turn off the filter, they won’t be able to filter through the jobs.
Step 7: Submit A Job
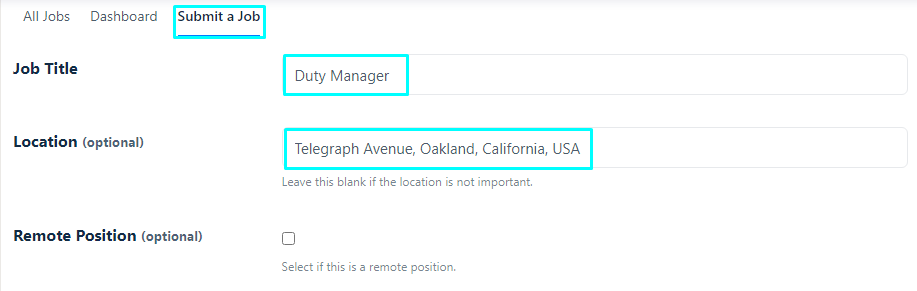
Now, let’s see how the Space Owners can create and Submit Job Listings from Spaces. Click “Submit Job” and you will have a page like this:
Now, let’s see how the Space Owners can create and Submit Job Listings from Spaces. Click “Submit Job” and you will have a page like this:
There, you will have several options to set up a job listing. Let’s go through them one by one:
Job Title: Here, put down the name of the post you want candidates to apply for. In my case, I am opening a job listing for a Duty Manager.
Location: Location is optional. If you want candidates to view the location of your workplace, you can add it. WP Job Manager is associated with Google Map API Key. Once you have uploaded the location, viewers can track it on the map.
Remote Position: Many job sectors allow remote opportunities for workers. If your job nature is of remote position. Tick the box. If not, leave it open. In my case, Duty Manager is a physical stand-by position. Hence, I will leave it unattended.
Job Type: Mention the type of the job here. Whether it is full-time, part time, contractual based or any other, you can select it from here.
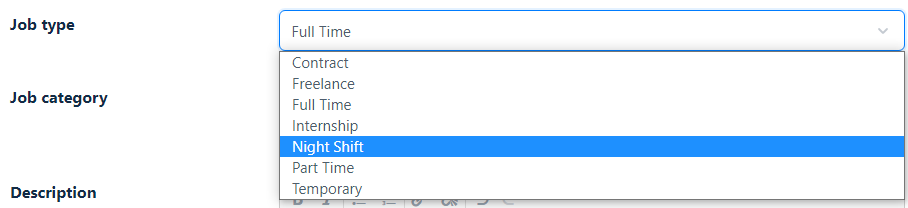
In my case, I am looking for a Duty Manager who can take the night shift. If you took notice, I have just assigned the listing to the job Category we have just created a few times ago.
Job Category: Job Category states the category of the job. You can create any new category or assign it to existing ones.
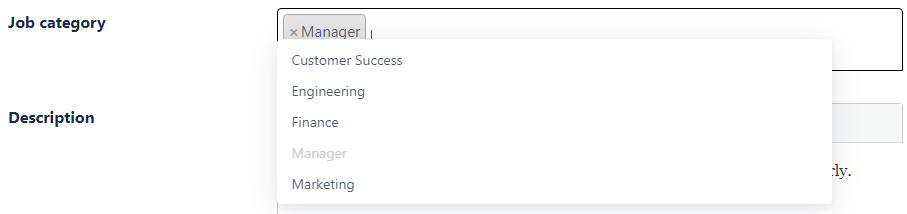
Since my job is at the manager level, I am filling out the position of “Manager”, from the category.
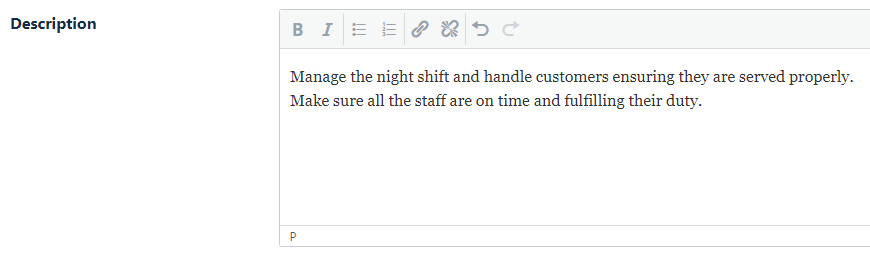
Description: Describe a bit about the Job you are posting here. There is no specific word limit here. You can add bullet points, attach links, adapt to Bold or Italic style here.
Application email/URL: Insert a common URL or email address to which all the job applications will be forwarded to. It doesn’t have to be of the default address as your Space and can be any email address. Better to forward all the pages to a single place 😀
Salary: You can mention the salary here. Not necessarily, you always have to. But it is preferable.
Salary Currency: You can add Salary Currency separately for any Job. Mention the default salary currency you want to offer your job as.

Once you are done, click “Preview” to check out how your job listing will appear for the candidates. You can also Save it as a Draft to use later.
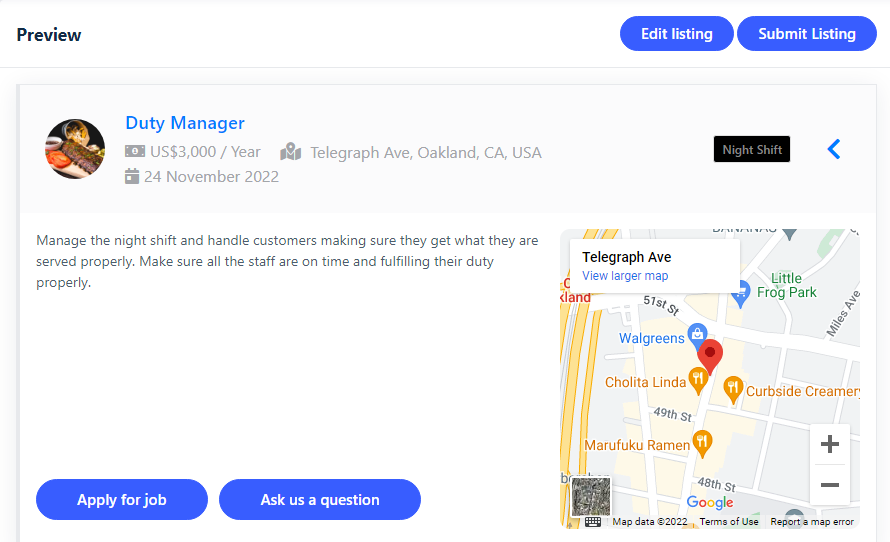
In my case, the job listing turns out to be like this. You can also set the salary per month or hour as per your requirement from Job Listings> Settings> Job Listings> Default Salary Currency. Thank me later!
Candidates can apply for this job from here or ask any question to the Space owners which will go to the Space inbox.
It takes only 2 minutes to submit a job. Once you are done with all the options, click “Submit Listing.” Now you can take a look at all the available jobs under “All Jobs.”
Here we are done with how you can submit a job as a Space Owner. Now if you have Applications and Resume Manager active in your dashboard, candidates can apply through an application (not by email) by providing specific information, and even submitting their resumes.
Let’s take a look at what the Application form looks like.
WP Job Manager – Application Form
WP Job Manager is not a mandatory plugin to publish a job listing. However, we will be using it here for this tutorial so that you can see how applications work for candidates.
1) Go to Job Applications > Application Form. Here you will see a form format like this:
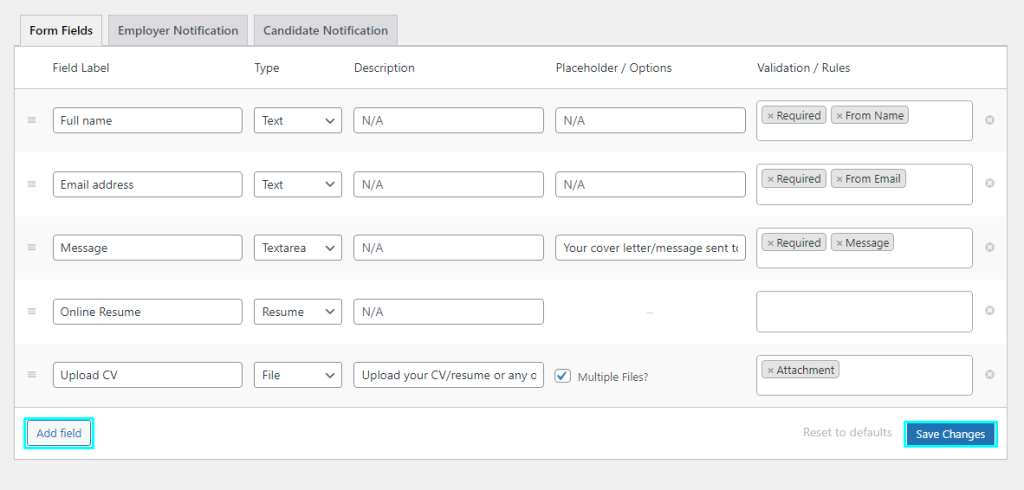
2) From this point, you can add additional fields here and add it to the form. Just fill up Field Label, Type, Description, Placeholder/ Options, Validations/ Rules and select “Save Changes.” And the additional field will be added to the menu.
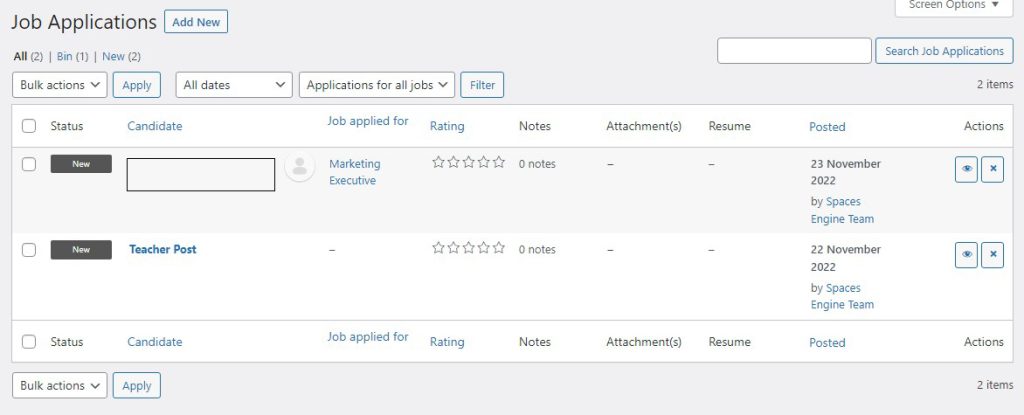
3) You can also preview the submitted applications from here. Go to Applications> All Job Applications.
We are at the end of our journey. If you are wondering what kind of interface candidates will face while applying for a job, here is one for you:
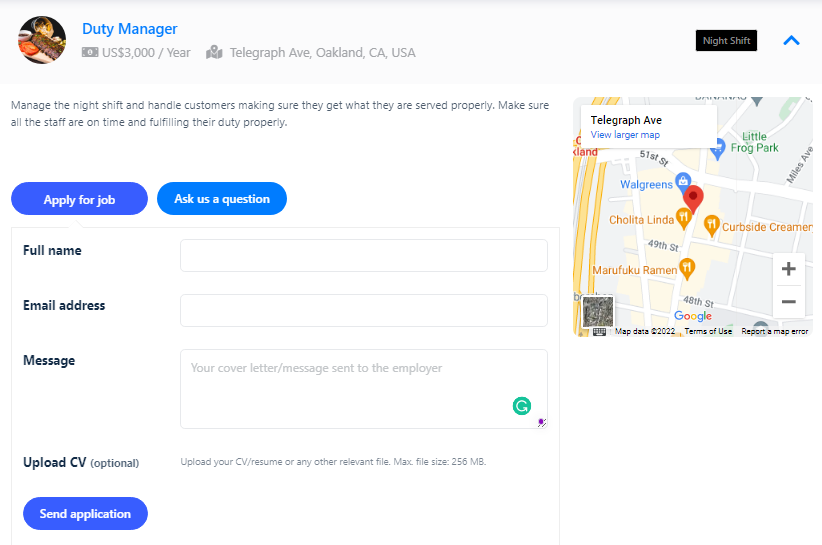
Candidates can fill-up the form, provide information, and even upload a CV as we had in our application before finally submitting the form.
That’s all for today. But don’t forget to keep in touch with us for the latest updates on Spaces Engine and its features.
If you have any inquiries or are facing any issues using WP Job Manager for Spaces, please contact our support team here.