Spaces now allows you to enjoy the features of one of the best membership plugin Membership and limit Space creation by user roles. Here’s how you can do it:
MemberPress is a premium WordPress plugin. To use this plugin, visit their official site here and you can complete your purchase from there. Follow these steps one by one to integrate Spaces with MemberPress and limit Space creation to any member you want.
Step 1: Purchase the Plugin
Complete your payment and purchase MemberPress from their official website. There are three different purchase plans for this plugin. Make a selection that’s suitable for your website.
NB: Having an account in MemberPress.com is a must for purchase. Open an account if you don’t have one yet.
Step 2: Install MemberPress
You can install the plugin in two different ways. Once you have purchased the plugin, log in to MemberPress.com and go to “My Account > Download”. From there, you can download the plugin zip and install the plugin.
To have a clear idea on how you can install the plugin, follow these simple steps from MemberPress doc.
Step 3: Assign User Roles to MemberPress
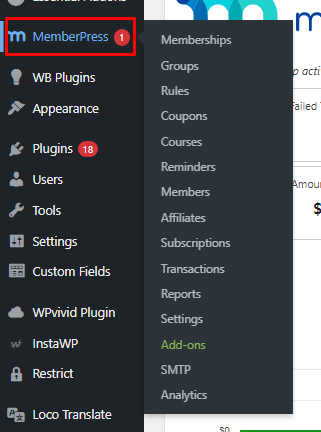
1) Once you have installed and activated the plugin, you will find a MemberPress logo in your WP sidebar. Hover on it, and you will see a drop down menu with several options to use the plugin.
2) To create and define a user role in your WordPress site, go to MemberPress> Memberships. After that, you will be forwarded to a window like that:
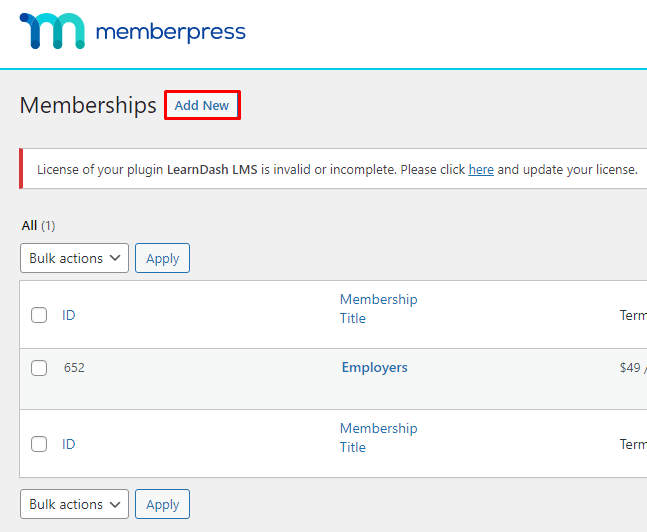
3) This page shows how many user roles you have on your website. You can also create new roles from this page. To create a new user role, click on “Add New.”
By default, you will be in the Registration tab for creating a new User Role. You can set a Title here for specific user roles.
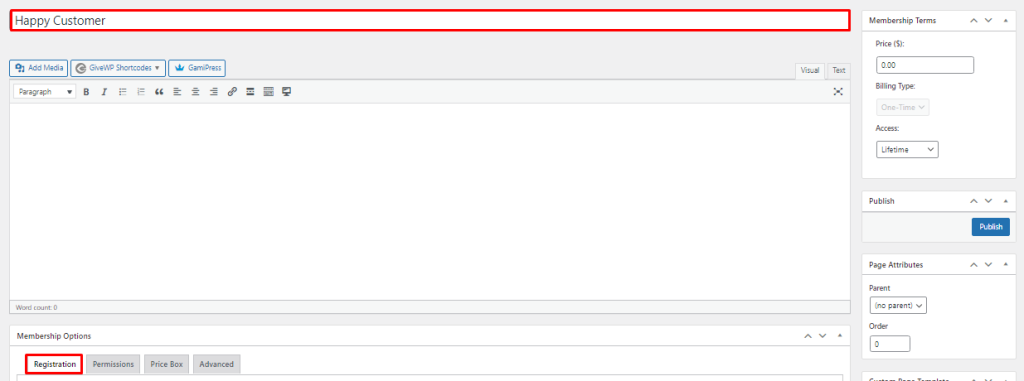
You will have several options like sending welcome emails, customising payment methods, disabling address fields from here. However, for now, we will focus on creating and defining an user role only.
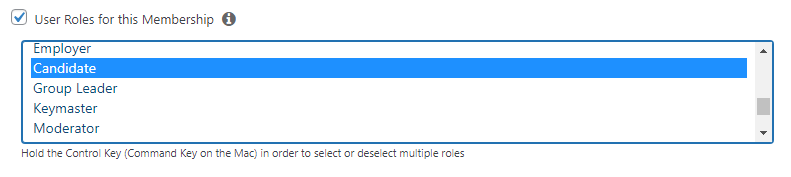
4) Go to the Advanced tab from Member Options. Here, along with several other options, you will see “Use Roles for this Membership” option.
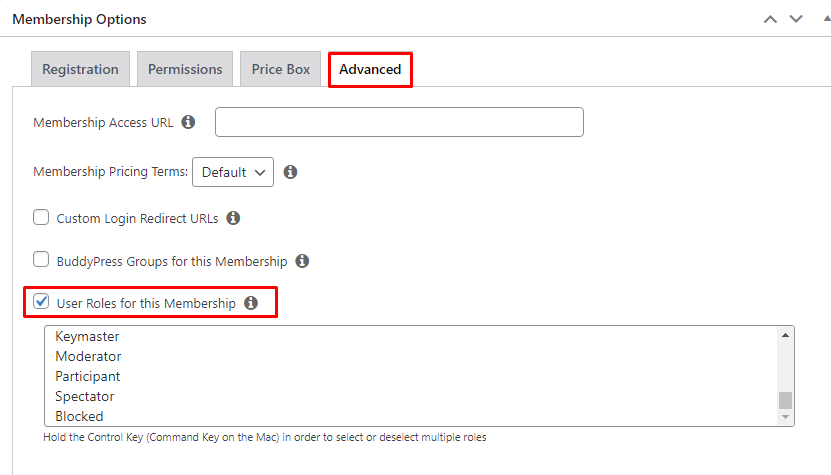
5) Tick on this box to define the user role (In this tutorial: Happy Customer) to any specific role with your WordPress site.
Once you are done with all the steps mentioned here, hit on “Publish.”
Important Note: You can also assign a number of user roles to a single membership role. For this, hold the Ctrl button from your keyboard and select other user roles that you want to assign.
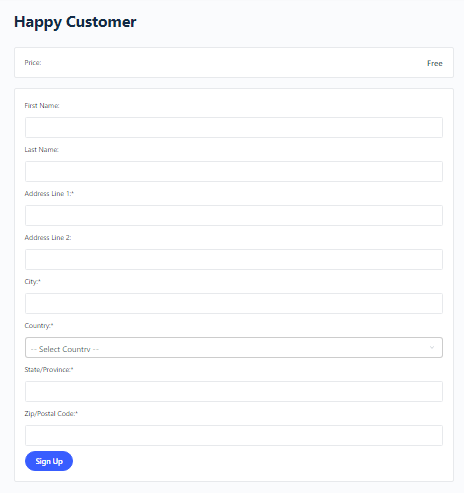
6) Your membership role has been created and now you can check it out from the front end as well. Click on “View Membership.”
Step 4: Limit Spaces to User Roles
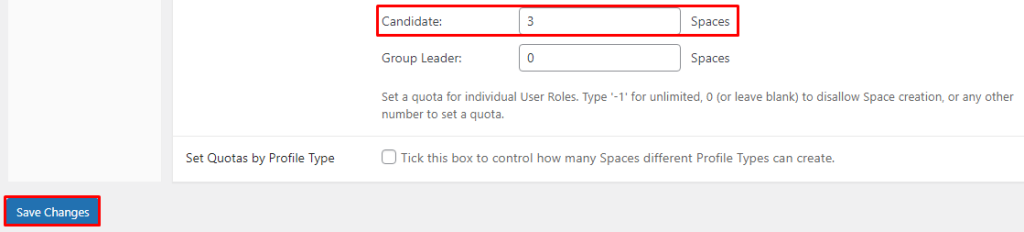
From the Advanced tab of MemberPress, we have already assigned the User Role “Candidate” for this membership. Now we just have to assign Space numbers to this user role.
1) Go to Spaces> Settings> Member Access from your WP dashboard. Find out the Candidate role from the User Roles drop down menu.
To know more about Space Restriction, please visit here.
If you assign 3 Spaces for this role Candidate, anyone who signs up for a “Happy Customer” membership will only get to create 3 Spaces on your website. Click “Save Changes” and you are all set to go.
We hope this document made this process easier for you. However, if you have any more questions, you can reach us out at [email protected].


