With Spaces, you can now limit Space creation to different BuddyBoss profile types. Spaces have always been improving your experience with BuddyBoss. Using Restrict Content Pro to limit Space creation is one of the methods to manage your Spaces more systematically.
Here’s what you should do to integrate Restrict Content Pro with Spaces Engine:
Plugins Required:
- Restrict Content Pro
- Restrict Content Pro- BuddyPress Integration
Both of these plugins are premium WordPress membership plugins. However, Restrict Content Pro does have a free version (Restrict Content). But for this tutorial, Restrict Content Pro is the ideal one.
Notes:
- Restrict Content Pro- BuddyPress Integration is a seamless integration plugin between your BuddyBoss Platform and Restrict Content Pro, meaning you must have both of these plugins (BuddyBoss Platform and Restrict Content Pro) installed in your WP site to make it work.
- You do not need to have BuddyPress installed in your platform to make this plugin work. When you have the BuddyBoss Platform installed, it shapes the way for BuddyPress Plugin.
Limiting Space Creation for BuddyBoss Profiles Using Restrict Content Pro:
Step 1: Installation Of The Plugins
Restrict Content Pro is a premium WordPress plugin. Hence, we will continue to work with Restrict Content Pro and Restrict Content Pro- BuddyPress Integration (Both Premium Versions). You can purchase them from their official website here.
Once you have purchased both plugins, go to Plugins> Add New.
- Installing Restrict Content Pro: Click “Upload” and select the Zip plugin file you received after purchase. Once you have uploaded the file, click “Install Now.” And then select “Activate Plugin.” Restrict Content Pro will now be activated.
- Installing Restrict Content Pro-BuddyPress Integration: Installing Restrict Content-Pro BuddyPress Integration requires the same steps as Restrict Content Pro. Upload the Zip file from your download folder, install and activate it. Once you have done that, your plugin is ready to work on.
Step 2: Setting Up Restrict Content Pro
Integrating Restrict Content Pro with BuddyBoss requires a few easy steps. Follow these directions, and you will be ready to assign Spaces for different Profile Types.
1) Go to Restrict> BuddyPress from your WordPress Dashboard. Here, you will see two Tabs – General and Settings. Go to “Settings.”
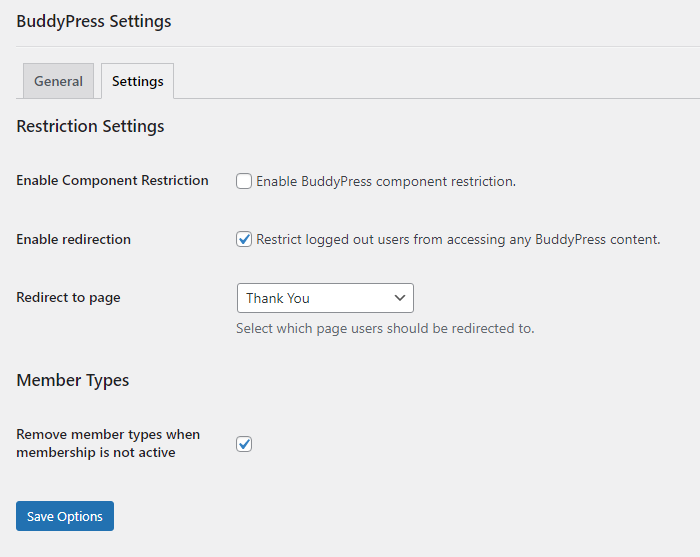
Here, you will find several options to restrict BuddyPress contents and components. Not only on contents, but you can also set restrictions on Components like Video, Messages, Friends, and Invites. Several options include enabling redirection for logged-out users and removing member types for inactive memberships.
2) You can set these options accordingly and select “Save Options.”
Step 3: Integrating with BuddyBoss Profile Types
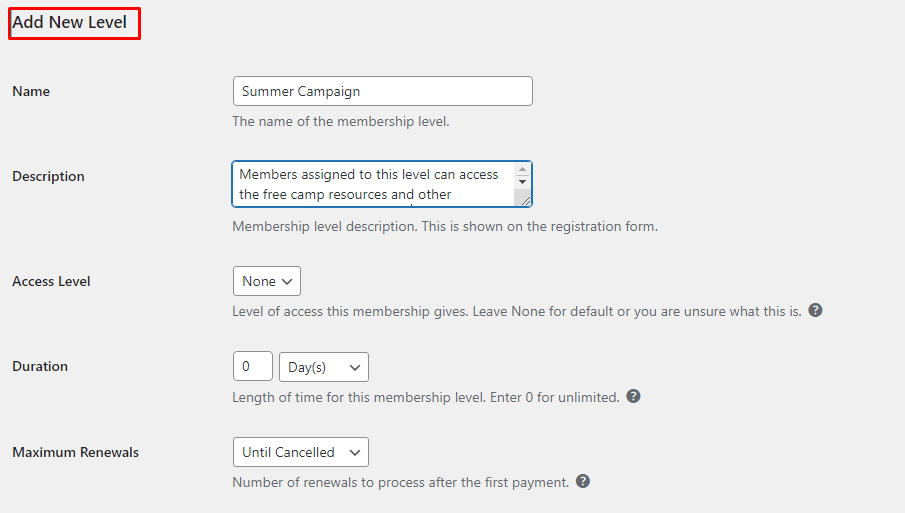
1) Now, we will assign BuddyBoss Profile Types to a new or existing Membership level. To do so, go to Restrict> Membership Levels.
2) You will find a window with Add New Level below the membership levels. You will have several options here.
3) Set a Name and write down a few words of description about this level here. You will see several other options here. Set them accordingly.
4) Now, scroll down, and you will find “Member Type.” This option syncs you with BuddyBoss Profile Types.
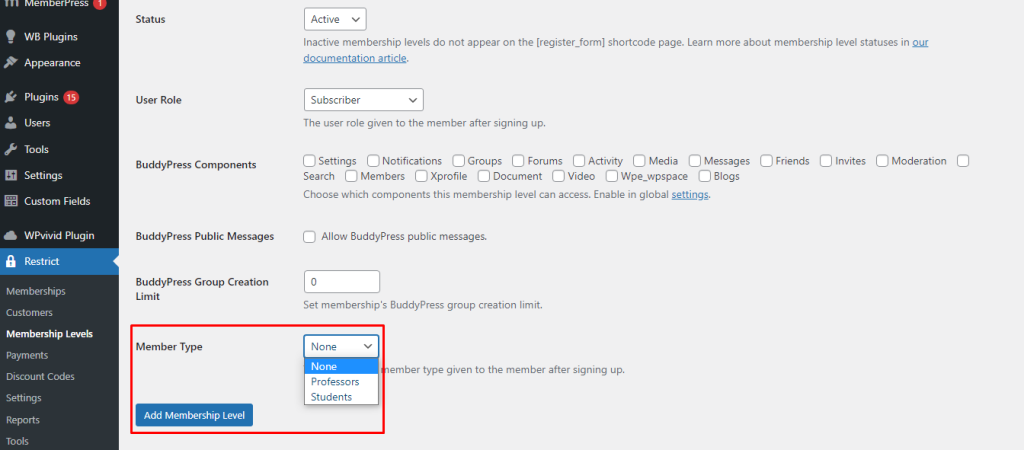
You can see a dropdown list of BuddyBoss profile types here and assign them to existing or new membership levels. We can, then, restrict Space creation accordingly.
After setting up all the options, click “Add Membership Level.” And you are good to go.
Editing Existing Membership Level:
You may need to edit an existing membership level for a new member type. To do so, follow these simple steps:
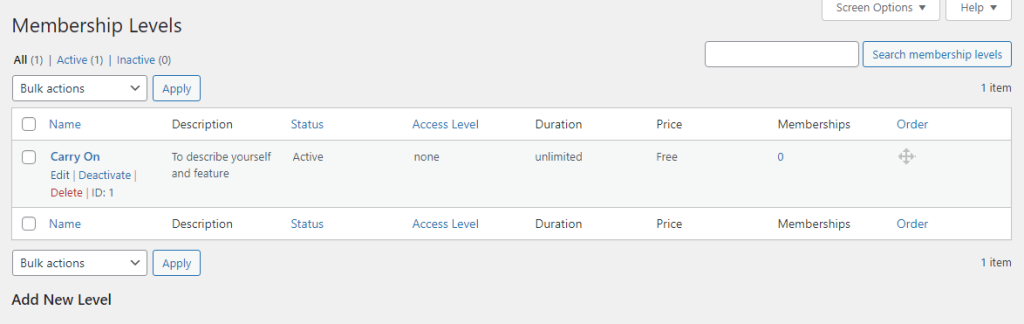
1) Go to Restrict> Membership Level and hover on the membership level you want to edit. Three options will appear; select Edit.
2) You will see a window show up before you with multiple options. Scroll down and go to Member Type.
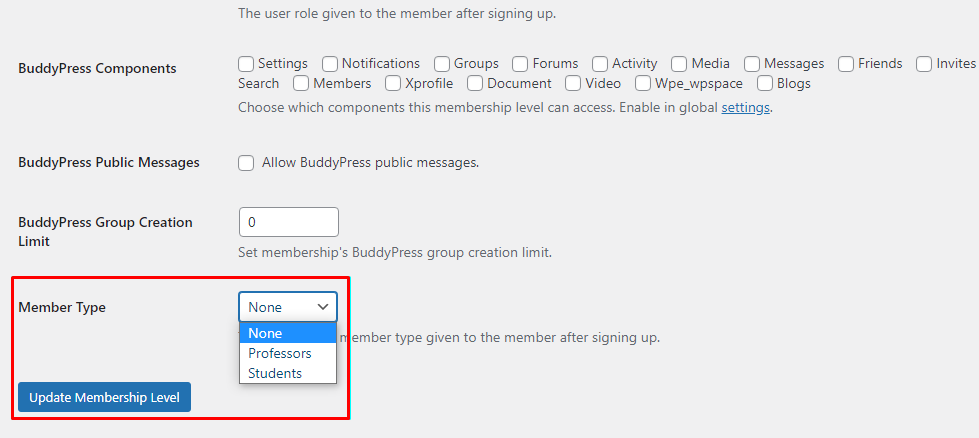
3) Select the desired member type you want to assign this Membership level into. And click “Update Membership Level.”
Step 4: Limiting Space Creation for Profile Types
1) To limit Space numbers by BuddyBoss Member Types, go to Spaces> Settings> Member Access.
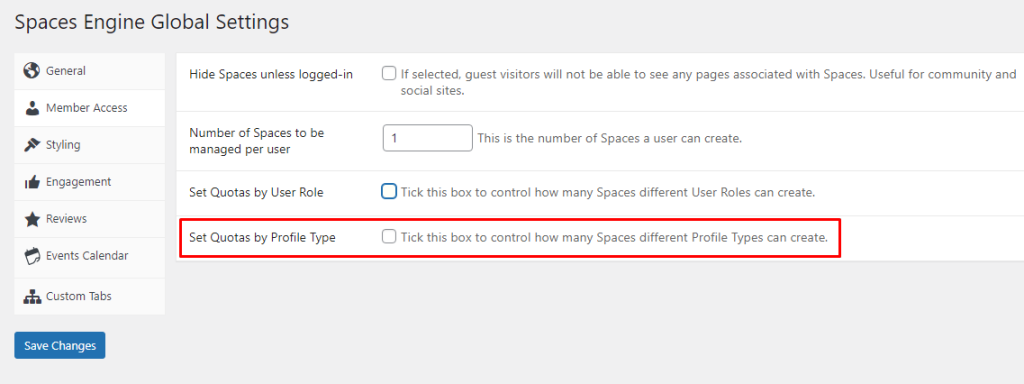
2) Go to Set Quotas by Profile Type and tick the box.
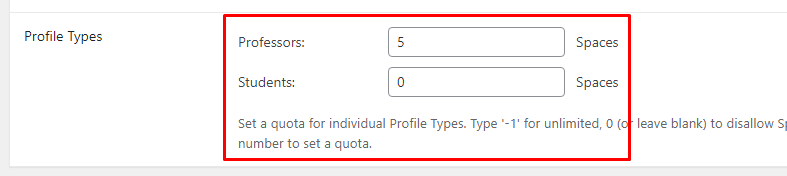
3) Here are two different boxes for Professors and Students. Set the values to any number and assign them to that specific profile type. Click “Save Changes,” and you are all set.
Learn more about Restricting New Space Creation here.
Following these steps, you can limit the number of Spaces by BuddyBoss Profile types and organise the Spaces accordingly. For any inquiry, you can reach us out at [email protected].


