Restricting Spaces for BuddyBoss Profile Types is a useful feature for the community. In this tutorial, we will learn how to integrate WishList Member with Space Engine to limit Spaces.
WishList Member is a premium WordPress plugin for creating seamless membership websites. Unlike many other plugins, you don’t need additional integration plugins to integrate with BuddyBoss. The entire integration process is seamless and comes with one plugin solution for all.
To integrate WishList Member with Space Engine, follow these steps with us:
Managing Profile Types with WishList Member:
Step 1: Install WishList Member
WishList Member is a premium plugin for WordPress. Purchase it from their official website here. You will receive a downloadable folder and the Purchase Key by email when complete. You can also access the License key anytime with the WishList Member from the Downloads tab of the Customer Section.
1. Go to Plugin> Add New> Upload Plugin from your WordPress Dashboard. Select the plugin zip folder and click “Open.”
2. Once you have uploaded the plugin, hit “Install Now.” When the installation is complete, select “Activate Plugin.” That’s it. WishList Member is installed and running on your platform now.
Step 2: Integrating With BuddyBoss Platform
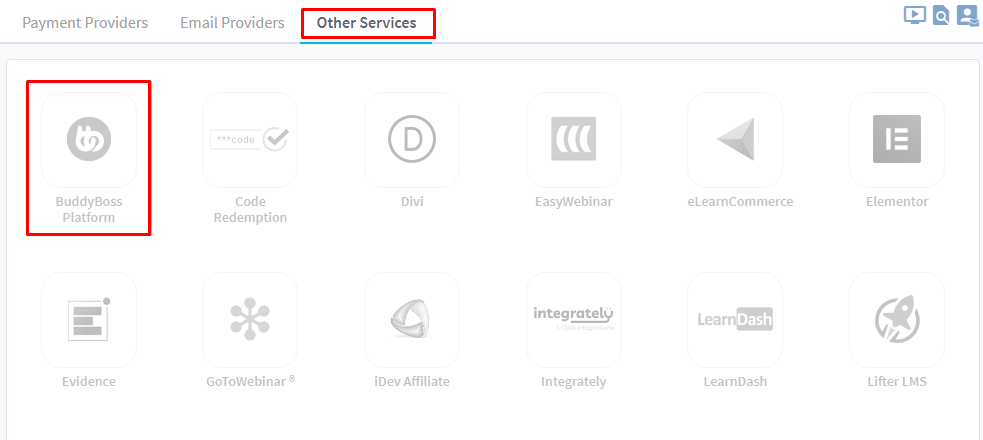
1. Integrating WishList Member with the BuddyBoss Platform requires only a few steps. Here’s what you should do. Go to WishList Member> Setup> Integrations.

2. You will see three different tab headers here. Go to Other Services and click on the BuddyBoss Platform logo.
Once you have done that, you will see a window like this:
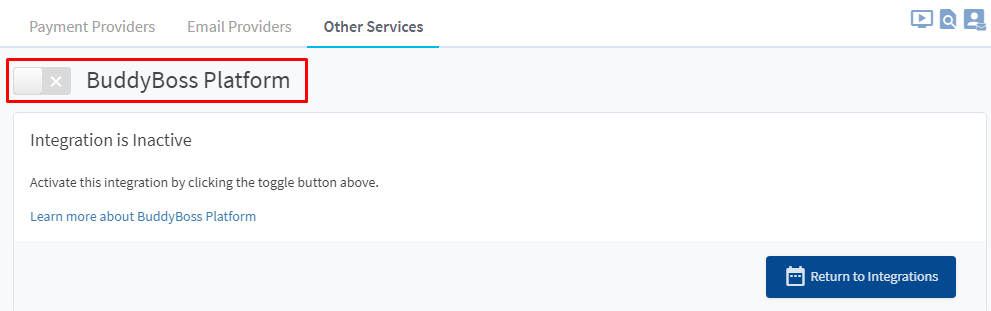
You will have a message here – Integration is Inactive. Toggle the button here to activate BuddyBoss Integration.
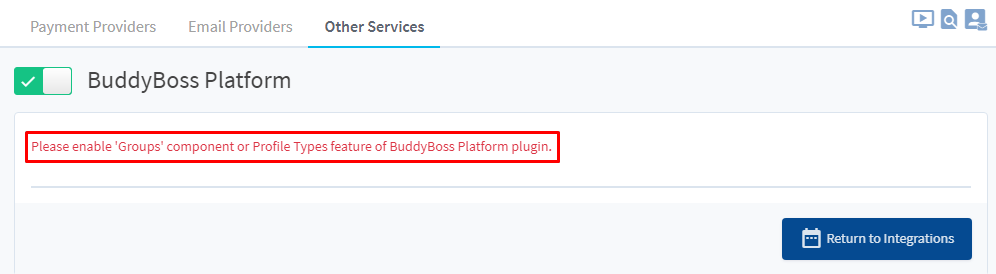
Important Note: The integration will be successful only when Profile Types or Groups are enabled in your BuddyBoss Platform. If not, then you will be shown a message to enable Group Component or Profile Types for BuddyBoss Feature like this:
Activating Profile Types for BuddyBoss Platform:
1. Go to BuddyBoss> Settings>Profiles. Here, you will see several options for Profile Names, Images, Headers, and others.
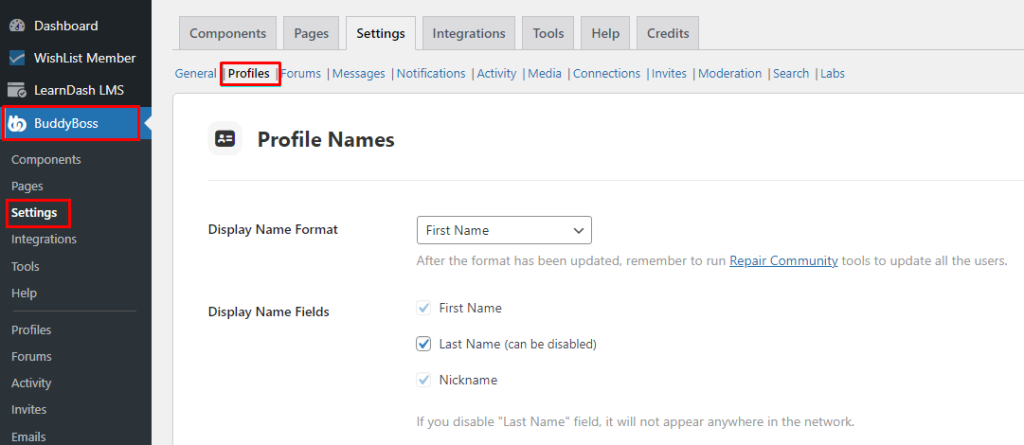
2. Scroll down and go to Profile Types.
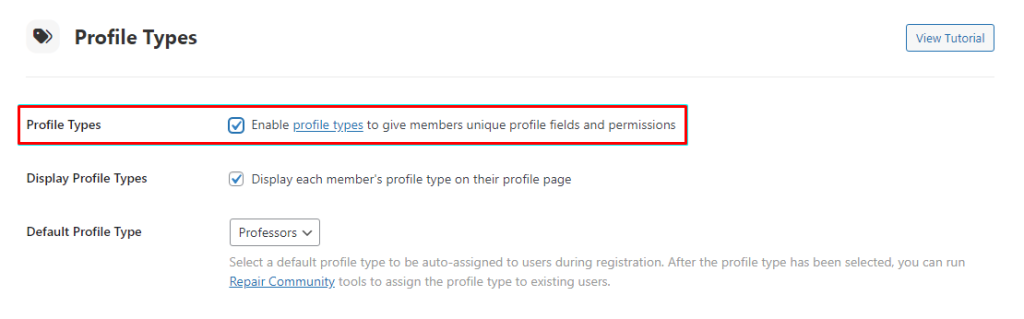
3. Tick the “Enable profile types to give members unique profile fields and permissions” button and click Save Settings. And you are all set to go.
Step 3: Managing Membership Levels for Profile Types
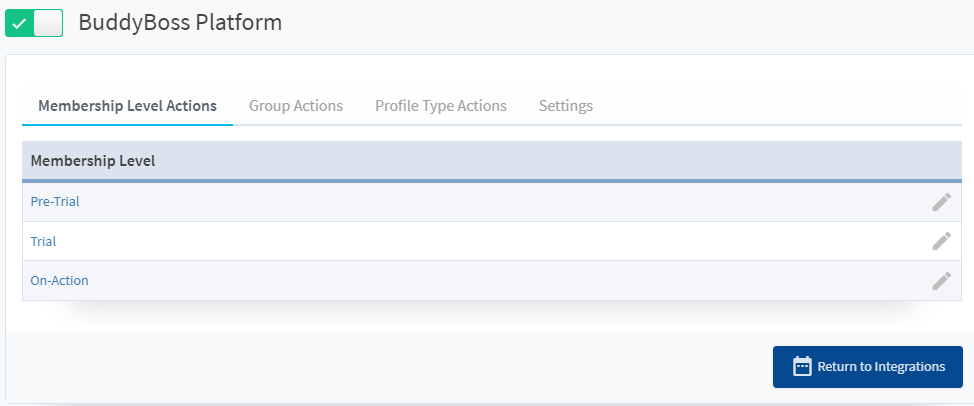
1. Now that you have enabled Profile Types for BuddyBoss, go to WishList> Setup> Integrations. Select BuddyBoss Platform and toggle the button. This time, since your profile types are active, you will see a box like this:
Creating Membership Levels in WishList Member
1. Go to WishList Member> Setup> Levels.
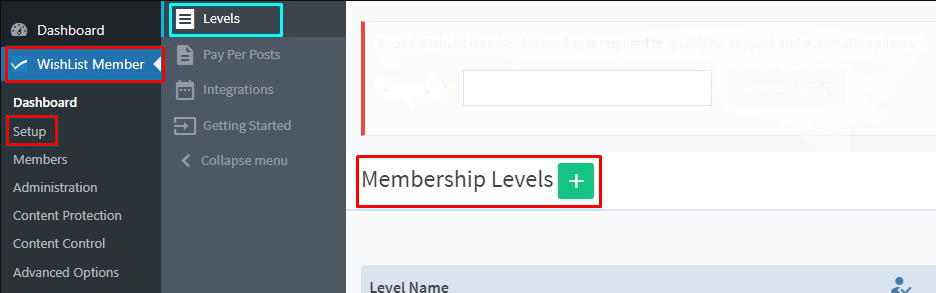
2. You will see a Plus Icon with Membership Levels on it. Click the Plus sign, and a box will appear.
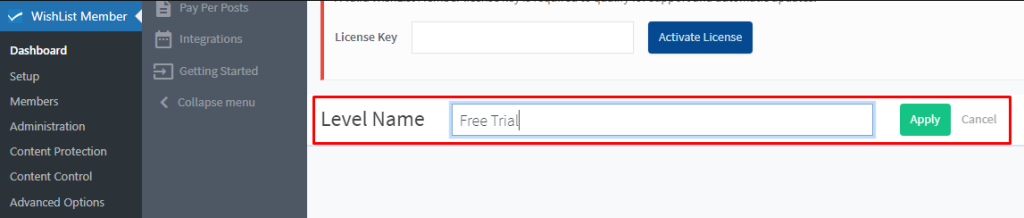
3. Now, you will have a window like this.
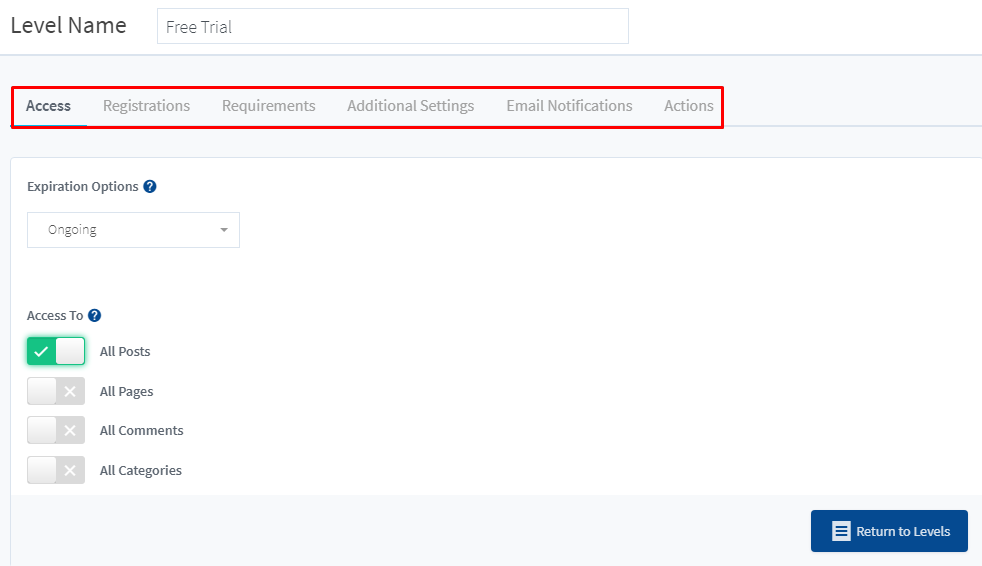
From here, you can have different setting options to modify this membership level Free Trial. When you are done with the settings, you can select “Return to Levels” and go back to the main page.
Step 4: Assigning Profile Types to Membership Levels
1. Go to Integrations> Other Services> BuddyBoss. In the front tab, you will have a list of all the membership levels.
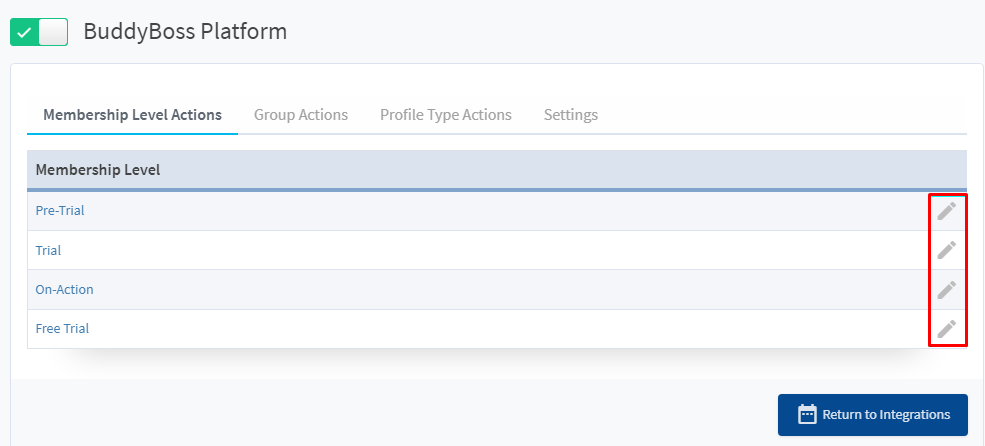
2. Choose the Membership Level you want to work on and click on the pencil icon from its right side.
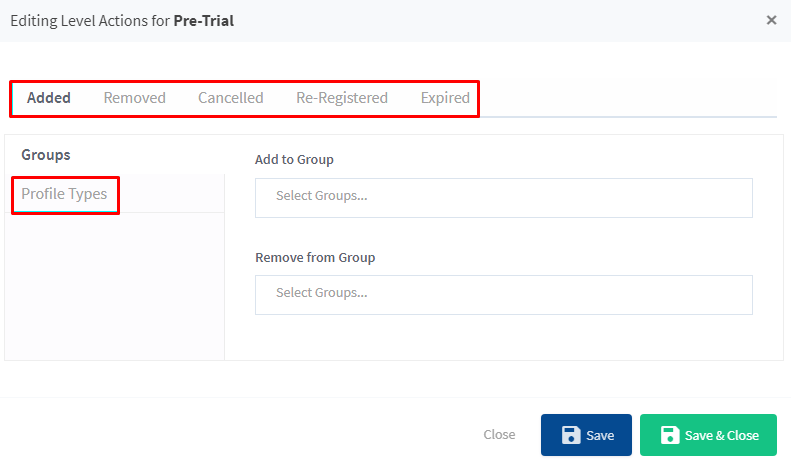
Now, a box appears before you with five different editing actions for each membership level. You can see here, these editing level actions are taken for Pre-Trial membership.
3. You will have two same options – Groups and Profile Types under each editing action. Since we are working with Profile Types here, we will go with Profile Types.
4. When you select “Profile Types,” you will see a box appear like this:
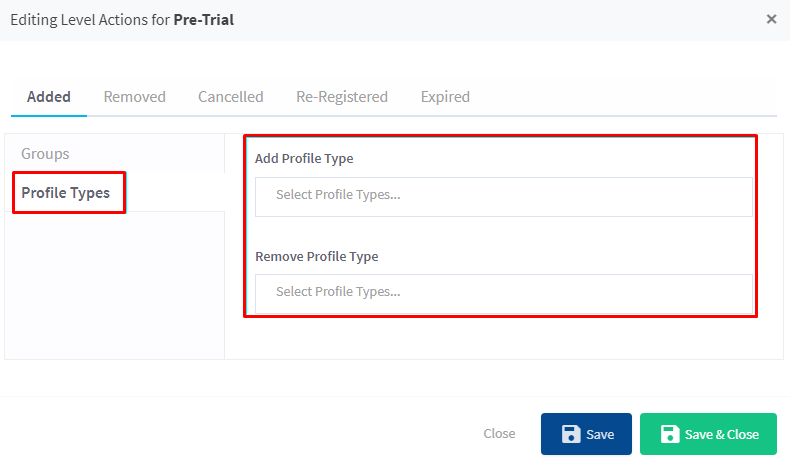
FYI: You can add/ remove several Profile Types if it’s needed. But to keep things simple, we will work with a single profile type.
These two options for Profile Types are common for Removed, Cancelled, Re-Registered, and Expired editing actions.
For this tutorial, I have added the Profile Type – Professor for the Pre-Trial level, meaning each time a member is assigned to the Pre-Trial level will be automatically added to Profile Type – Professor.
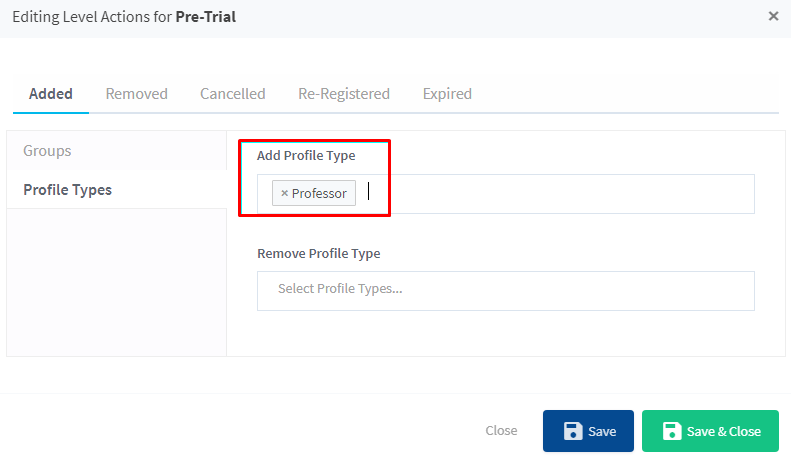
When it is complete, click “Save & Close.”
Step 5: Limiting Space Creation for Profile Types
To limit Space creation, go to Spaces> Settings> Member Access.
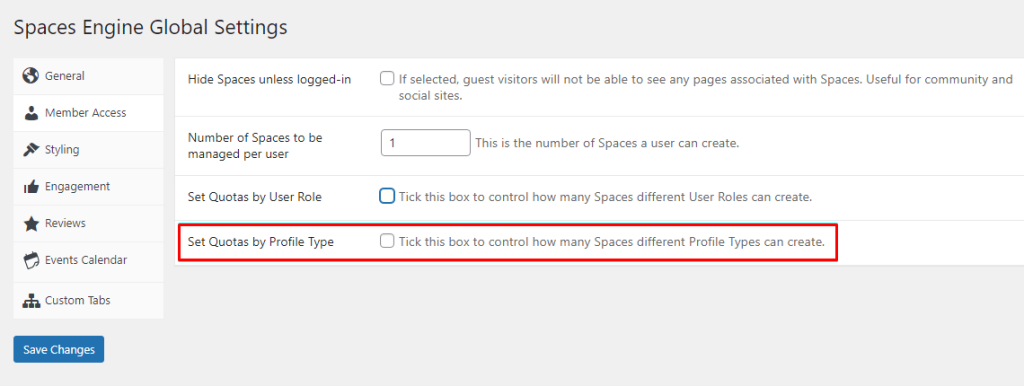
Go to Set Quotas by Profile Type and tick the box.

You will find two different boxes for Professors and Students. Set the values to any number and assign them to that specific profile type. Click “Save Changes,” and you are all set. Now, members in the Pre-Trial level can create five Spaces as you have set.
Learn more about Restricting New Space Creation by Profile Types here.
For further information or any kind of inquiry, please contact our support team here [email protected].


